Pages

Monday, October 31, 2016

Spooktacular Frightful Halloween with Angeline

Happy Halloween!
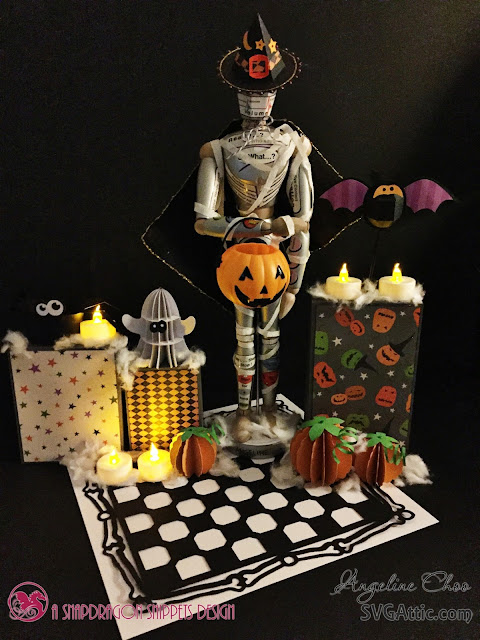
Angeline here to share with you a spooktacular frightful Halloween scene I made using the sets below:


Although I don't celebrate Halloween, it was fun making this scene. 
Take a deeeeepppp look and get ready to be spooked! :D
(Can you spot the spider?)

SVG Attic: Spooktacular Frightful Halloween with Angeline #svgattic #scrappyscrappy #halloween #diecut #svg #papercraft

I made pumpkins (love the spiral tail!)

SVG Attic: Spooktacular Frightful Halloween with Angeline #svgattic #scrappyscrappy #halloween #diecut #svg #papercraft

I custom made this wizard hat for my doll and added a cape and mummy tissue wraps for him too.

SVG Attic: Spooktacular Frightful Halloween with Angeline #svgattic #scrappyscrappy #halloween #diecut #svg #papercraft

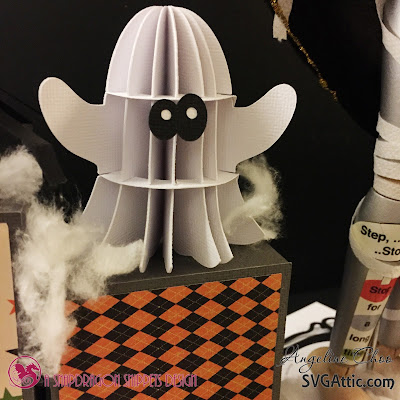
And how can I forget this cute ghost?

SVG Attic: Spooktacular Frightful Halloween with Angeline #svgattic #scrappyscrappy #halloween #diecut #svg #papercraft


***

Thanks for stopping by and have a wonderful week ahead
Angeline Choo
blog // facebook // instagram // youtube


Friday, October 28, 2016

Organize Those Planner Supplies with Lisa


Hi and welcome, everyone. Lisa from The Relativity of Paper sharing a fun way to organize all your planner supplies. I've recently entered the Planner World, and just like crafting, I need to organize my supplies, or it can get scary, quick!  A few months back I used the Desk Organizer from SVG Attic's G is for Gratitude to create a Gift Station. It held tags, tape, twine; you get the picture, right? I quickly repurposed it to hold some new planner stamps, pens, washi tape, correction tape, appointment cards, and planner clips; it's perfect.  I since decided Seasonal Organizers are a must because I decorate my planner by seasons. So here is my Winter Planner Organizer. I keep this sitting on a shelf in my craft room, with easy access I can step in and put my appointment cards in the side pocket, and have them ready for a planning day. 


You will be surprised at the number of supplies this holds. 


The pockets on the sides are perfect for appointment cards and pens. 


I used DCWV Hand-Painted Christmas 12 x 12 Patterned Paper to decorate the organizer. 
I recommend a heavy cardstock. I used Bazzill 12 x 12 Cardstock.
As always, thanks for joining us! 

Wednesday, October 26, 2016

Trick Or Treat Bags

Halloween is less then a week away, I am not sure how that happened but it did!
Tracy here from the Idea Closet.
This week my project for SVG Attic is these bright Halloween bags, perfect for little
 Trick or Treaters!


I used the CG Father Christmas files to make my bags. 


 I LOVE these bags!

They are the perfect size for whatever you need.


The bigger bag is perfect for a Trick or Treat bag for a smaller person.  Not as big as a pillow case, its easy to carry with the ribbon handles and just the right size for all those fun size candy bars.
Use some fun, bright printed paper and its as cute as it is functional.


The smaller size bag is ideal for filling with Carmeled Popcorn or another yummy treat and sharing with that special someone. 

To decorate the outside of the bag, use images from the What's Brewin' Collection.

The tree and house  are embossed with an embossing folder to give it a little more depth.
Tie a big tulle bow to the handles and you have a bag that is almost as delicious as anything you fill it with.

Come on over to SVG Attic and finish up those last minute  projects and 


Happy Halloween!

Monday, October 24, 2016

Batty Countdown

BLAH, BLAH, BLAH Only 7 more days till Halloween!  Tanya from Crafting on Caffeine here today. I have had this idea since I first saw this bat! I just love how it turned out, hope you do too. Now on with the details!
Of course the Bat is from JGW Night Enchantments


Paper is from Doodlebug Designs and DCWV


Love the candy corn teeth! I added bows for the ears made from Trendy Twine's Trick or Treat.


I made the wings into shaker wings using Grape Licorice Batty Sequins from Annies Paper Boutique


The eye paper just spooks me, but I thought would be perfect since everyone will be watching the numbers countdown!

Hope you enjoyed! Please watch for more coming soon!

Saturday, October 22, 2016

Halloween Treat Box and Card

Hello crafty friends! Beth from Beth's Beauties here with you today, and I simply had to go with Halloween themed projects for today's post!
First up, I made this candy corn treat box from the JGW Ghostly Sweet Tooth set.  I used DCWV's Spooky Delight stack, Blue Moon Bead Charms and Midnight and Orange Licorice Trendy Twines.
Here is a view of the box opened up.  It will hold several fun size candy bars!
My second creation is a double diamond fold card from the JGW Welcome to BOO-Ville set.  Isn't it an awesome card style?!
I used DCWV's Spooky Delight and Mixed Media stacks, Blue Moon Bead Charms and Bumblebee Trendy Twine.  The stamp on the lower right corner is from APB Happy Halloween stamp set.  In this picture you can see how it looks all folded up.  There is a matching envelope for this card in the JGW Welcome to BOO-Ville set as well.

Here is a look at the sets I used:


I hope you have a wonderfully crafty day!

New to SVG Attic?  Check out these awesome places!

Friday, October 21, 2016

Father Christmas ~ with Cyndy G.

Good morning and happy Friday!  Today I wanted to share with you a fun bag and card from the new kit CG Father Christmas.  This is such a fun kit.  There are three cards and two gift bags.


I used the beautiful new Graphic 45 St. Nicholas paper for this project.


This is the smaller gift bag from the kit and it is 6.5" x 8" x 2.  
Just perfect for a smaller gift.


This card is my favorite.  Santa checking his list.


There is plenty of room on the back to journal or add stamping.

Thank you for stopping by.

Do what inspires you,
Cyndy G.

Wednesday, October 19, 2016

Haunted Cottage

Hello all. I-team Sonja here with a fun take on the cottage from the RW English Cottage Kit

I am doing a three part posting. Every two weeks for my next three postings will be a new cottage to show you the versatility that can be done with this set! 

To begin with, who is excited for Halloween this year? The inspiration for this haunted house came to be when some neighbors up the road started assembling their yearly haunted house attraction. 

 The front of the cottage displays a friendly ghost who is riding the haunted house of the unfriendly ghosts!

 The wicked witch has found herself in an unfortunate situation. 
 When this house is lit at night, the middle window displays a few secrets held within the walls of this old cottage. 
 First side of the house
 The back of the house has a little cemetery and creepy tree.
 Notice the little cobwebs found throughout the house!
 And the final side of the house

Now, turn the lights off and watch it come to life!!!


 In each photo, the eyes are a different color from the rest of the lit up windows.


To achieve this effect, I used two different flame-less colored candles.

Tune back in on the 2nd for the next inspiration cottage! 


Materials Used:
DCWV Seasonal Wreath stack
Image result for DCWV Holiday wreath stack
RW English Cottage Kit
SDS Ghostly Graveyard ~ Tree and Coffins
SDS Ghostly Graveyard
SnapDragon Snippets ~ Spider, web, and ghosts
Craftwell eBrush
Sharpie Markers
Silhouette Cameo
Scotch ATG Gun
Aleene's Regular tacky glue

Monday, October 17, 2016

Christmas Gift Bags with Angeline

Happy Monday :)
Angeline here to share with you some Christmas gift bags I made using Cyndy's CG Father Christmas kit.

How many times in the past I have wanted to give somebody a gift but had no pretty gift bags to put it in?? From now on... never ever again!! I absolutely LOVE this kit coz it has two sizes of gift bags you can make --- and think, not only Christmas but birthdays, anniversaries, baby showers, and MORE! Oh wow.. the possibilities are endless.

SVG Attic: Christmas Gift Bags with Angeline #svgattic #scrappyscrappy #christmas #fatherchristmas #holiday #giftbag

Since Christmas is almost here, I decided to make some holiday gift bags. I took out my stash of Christmas papers and turned them into these!

Add a nice ribbon and a gift tag --- and the bags are ready to go!

SVG Attic: Christmas Gift Bags with Angeline #svgattic #scrappyscrappy #christmas #fatherchristmas #holiday #giftbag

SVG Attic: Christmas Gift Bags with Angeline #svgattic #scrappyscrappy #christmas #fatherchristmas #holiday #giftbag

Seriously, you will not believe how EASY it was to make these bags -- go get the kit and you will see for yourself :)


***

Thanks for stopping by and have a wonderful week ahead
Angeline Choo
blog // facebook // instagram // youtube

Friday, October 14, 2016

Spooky Treats with Lisa


Hi and welcome, everyone! Lisa from The Relativity of Paper sharing an excellent way to use 
Tent Cards and the What's Brewin' SVG Collection to create treat bags.

Treat Bags using Tent Cards and Halloween SVG Cut files.

To get us started, I used a tent card from the Tent Card SVG Collection. I love using these cards because you have enough room to add fun elements including a bag of goodies. I added some candy corn to a project life pouch and stapled it in place. You can use a regular cellophane bag with this, too. I can't wait to make these for Christmas

Treat Bags using Tent Cards and Halloween SVG Cut files.
Then I added fun elements from the What's Brewin SVG Collection. I used the haunted house, fence, spider web, and the caption, Spooky to decorate the front of the card. 


I have a fun tip using these same files to create stickers for your planner. I use a planner and have to say I love decorating the pages. When I work on cards and other paper projects I always have someone else in mind but my planner is all ME! It's whatever I feel like that day. Sometimes it's silly & kooky other times sophisticated and elegant. 
Happy Planner Weekly Layout 10/10-1016

 The haunted house, fence, tree, cauldron, spider webs, and spider are all from the What's Brewin Collection. I just sized them down to fit my planner, cut them out with my Silhouette, and ran them through my Xyron Sticker Maker. This layout might be one of my favorite weeks so far. 

You can find all the details on my blog, The Relativity of Paper.

As always, thanks for joining us!