Pages

Showing posts with label Allie Gower. Show all posts

Friday, July 25, 2014

Honeycomb Gift Box Tower

Hi, It's Allie and I'm excited to share a fun gift box project today using the JGW Blooming Card Kit with SDS Basic Deep Lid Boxes, shown below.

SDS Basic Deep Lid Boxes
JGW Blooming Card Kit

I made three of the hexagon boxes, reducing each layer to 75% of the original size.  I chose the hexagon because it looked like honeycomb to me. I kept the bee the original size. This project takes 2 sheets of paper and some scraps. You'll need some patterned paper, and some solid cardstock. I used scraps for the bee wings and the black backer on the bee trail.

Here is what the files will look like when you are ready to cut. I've just colored to make the images easier to identify.


And here's my Honeycomb Gift Box Tower.


I decorated with some flowers that I spritzed with Gold Shimmer Spritz. I attached these with Hot Glue. Each flower is glued to the base of the box OR the lid, so each layer can still open.
The bee trail is glued to the lid of the second box.

Here is the view from the back. It's a little boring!


And here are the layers opened. I did glue each lid to the base below. I felt it made the tower more sturdy.


Fill with treats and enjoy. I think this would be a perfect little gift box for someone's birthday, or a great centerpiece for a table - you can make the boxes as large as you'd like, and stack as many as you want!

Here are some pictures of the work in progress. I double inked the patterned papers using Rich Cocoa Memento on the edges, and rubbing in some Peanut Brittle Memento on the box and the patterned papers as well, to tie the color scheme together.

You can see the difference using the two colors - the yellows weren't a great match, and the Rich Cocoa really helps the panels to pop.

I inked the edges of the bee's wings with Summer Sky Memento and added some glitter.


Thanks for joining me today.

SUPPLIES

Cardstock (Bazzill)
Patterned Paper (Echo Park)
Summer Sky, Peanut Brittle, Rich Cocoa Memento Inks (Imagine Crafts/Tsukineko)
Gold Shimmer Spritz (Imagine Crafts/Tsukineko)
Flowers (Wild Orchid Crafts, Prima)
Glitter (ART Glitter)
Adhesive (ART Glitter Designer Dries Clear Glue and AdTech Hot Glue)

Note: I cut my files using the Silhouette Cameo. I recommend a new or sharp blade on a slower setting, as there are some tight angles in the box portions. 


Friday, July 11, 2014

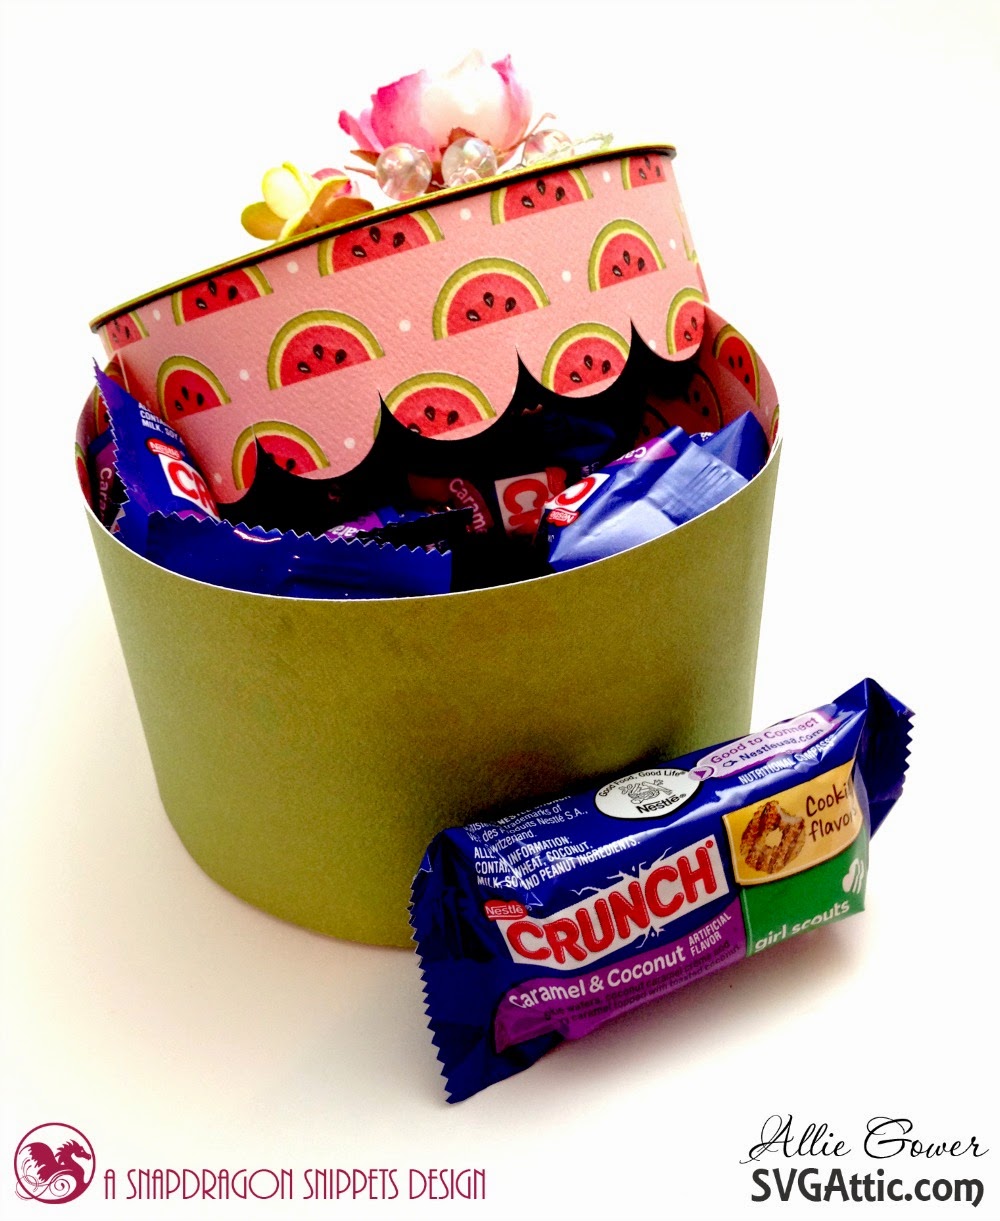
Perfect Picnic: Watermelon Gift Box

Hello, Allie here with a project from the Perfect Picnic kit.

Perfect Picnic Kit from SVG ATTIC

 I created the watermelon box.
What a perfectly summery gift box.
I resized the pieces in the kit 80% to make a 5 inch round box.


It was perfect for these delicious treats.


I finished the top off with some bling, flowers, and baubles.

I can't wait to make the rest of the pieces in the Perfect Picnic kit.
Thanks for joining me today.

Paper: Summer Lovin' from Carta Bella

Friday, June 27, 2014

the BUZZ with the JGW Blooming Card Kit

Hi, Allie here from My Card Party with a card from the JGW Blooming Card Kit.


This fun Blooming Card Kit has so many cute cards, along with an envelope.


I made mine as shown, changing up the colors so it's a little more monochromatic.
I double distressed the hive with Peanut Brittle and Rich Cocoa inks. The Peanut Brittle was kind of rubbed on, where the Rich Cocoa was sponged on, a little heavier in some places. I also used some Canteloupe ink to bring out the dots in the cardstock. I pop dotted almost everything at different heights. The wings on the Bee are inked with Summer Sky and glittered.

Supplies:

Blooming Card Kit (shown above)
Cardstock, Inks (Memento Inks from Imagine Crafts), Glitter, Adhesive

Thanks for joining me today!

Friday, June 13, 2014

Spring Fling Kit: Not Just For Spring

Hello! Allie here from My Card Party sharing a SUMMER project I made using the pinwheel cutting file from the Spring Fling Kit.


And here's my "Summery" Wreath.

spring fling wreath

I resized the pinwheel so I could fit 8 on a page. Each pinwheel is two pieces, so at just under 3" each, you can fit 16 on a page.  For the wreath, I made an 11" circle that filled the page, and then cut a smaller 8.5" circle out of the center.  I chose a fun hot pink patterned paper so that when it showed, it offered a little pop of color.

spring fling wreath

My pinwheels are slightly flatter than the ones shown in the kit. I really wanted the yellow polka dots to pop a bit more.

spring fling wreath

To finish it off, I added bling, a tag, flowers and decorative brads to the center. The papers, tag and brads are from Echo Park's Summer Bliss Collection. The bling is trimmed bits of Silver Swirls Finesse from Want2Scrap. The pink and green flowers are new from Want2Scrap. The white flowers are from Wild Orchid.

spring fling wreath

Thanks for looking today. Take a look through all the SEASONS to find something you can use for your SUMMER projects.


Friday, May 23, 2014

Bloom Where You're Planted - A Mini Album

Hi everyone! Allie Gower from My Card Party sharing a mini album I made as a gift using Jodi G. Warner's Blooming Card Kit.


The kit actually has this as a card, and I really didn't modify anything, just added adhesive carefully, allowing all the layers to function as pockets. I especially love that Jodi left room in the very front pockets with some clever box pleats to allow for bulkier items.


I created some easy tags and note cards to match the project. I used lots of ink and paint to distress the edges of everything. The sentiment "bloom where you're planted" was created using a Chomas Pen Holder with a Memento Marker. The font is called "Champagne and Limousines" and it's one of my favorites.


Inside, I created a smaller outline of the actual card base and added the flower that comes with the card kit, along with a plain mat for another photo. More pages can be added, and photos or journaling could also go above on the top flap.

When I purchase a kit, I love to have lots of options. The kits at SVG Attic are so versatile and fun to use in new and exciting ways.

Supplies:

Cardstock (White, Yellow, Tan, Dotted)
Memento Luxe Inks: Northern Pine, Peanut Brittle, Morocco, Toffee Crunch, Gray Flannel (Imagine Crafts/Tsukineko)
Memento Marker: Tangelo (Imagine Crafts/Tsukineko)
Flowers (Wild Orchid Crafts, Prima)
Hemp (Craft Supply)
Cottonball Paint (DecoArt)
Adhesive (Beacon's, Thermoweb Tape Runner, iCraft Tape)


Thanks for joining me today. Until next time, happy crafting!


Friday, May 9, 2014

Head North - Fishing Themed Gift Box

Hi all, Allie here from My Card Party sharing my Head North project, a fishing themed gift box using the Here's to You Dad Kit.


As soon as the ice melts, and even sometimes before... folks in Minnesota heads north for camping, fishing (ice fishing in Winter), sightseeing and shopping. A lot of families have cabins or RVs. 
This has been a LONG winter and I thought I'd make a nice "going back up North" treat for some friends that will soon be opening their cabin for the season.  

Maybe they'll invite me!


Here's a close up of the fishing rod and the sentiment. The hemp is looped round and round then secured with a few loops and a knot.
I used Caneletter Script font and fashioned an arrow using basic shapes to create the sentiment, then made a mat for it in Silhouette Design Studio.

Tip: If you are adhering anything to the buckle, make sure that your adhesive doesn't interfere with the box closing.


Flowers and bobbers, because no project is complete without them.
The flowers are placed on a hemp bow with hot glue.
The bobbers are all cut from white cardstock and hand colored.
The red parts were colored on the back and then distressed with ink and paint.


A little inking and distressing with markers and paint on the fly.
Lots of hemp. I used it to connect everything together.


Hinges. These are colored on the reverse side, it leaves a dark outline.


Inside trays are perfect for all kinds of candies and treats.

Supplies:

SVG Attic's Here's to You Dad Kit
Paper: Echo Park and Carta Bella, White Cardstock
(I used four sheets of the patterned Carta Bella Baby Girl Stripes Paper and one of the Yellow/Navy Echo Park Paper, with one sheet of white cardstock.)
Ink - Imagine Crafts/Tsukineko
Paint - DecoArt
Black Rhinestones - Want2Scrap
Hemp
Flowers - Wild Orchid Crafts

Adhesive (Hot Glue, Dimensional Foam, Liquid Adhesive)

Thanks for joining me today.


Friday, April 25, 2014

G is for Gratitude: Apple Core Storage Box


Hello Crafters! Allie here from My Card Party sharing a new project with you today that's practical and fashionable.

I'm using the Couture line from Graphic 45. I love this line for its fun quotes, sewing and fashioned papers, and classic colors. I needed something to hold some every day crafting tools so I looked through the SVG Attic store to see what I could find.

I found the G is for Gratitude kit and thought the Apple Core looked a lot like a spool.

I cut the base out of yellow cardstock and assembled the base. I distressed the base with Claret StazOn and Peanut Brittle Luxe ink (Imagine Crafts/Tsukineko) and a little bit of white paint. I sealed it up with some Shimmer Texture Goosebumps. I added the scroll liner cut from Couture paper and embellished with flowers and twine, some pins and bling. I tucked two of the cards from this paper line.

One card reads "A girl should be two things: classy and fabulous" and the other reads "In order to be irreplaceable, one must always be different." Both quotes are fantastic, and are by Coco Chanel, one of my favorite fashion designers of all time!

Get the kit to create this project here:

SVG Attic G is for Gratitude

Project Supplies: Cardstock, Patterned Paper (Couture from Graphic 45), Rhinestone Flourishes and Pins (Want2Scrap), Craft Wire, Ink, Shimmer Texture Goosebumps, Twine, Flower (Wild Orchid Crafts), Adhesive
Project Tools: Silhouette Cameo, Designer Edition Software, Trimmer, Wire Cutters, Hot Glue Gun


Thanks for joining us today. 
Why not try something different with one of the amazing kits at SVG ATTIC?

Friday, April 11, 2014

I-Team: Allie Gower

Hello Everyone!

My name is Allie Gower and I create happily in the Twin Cities in Minnesota, home to LOTS of snow, the Vikings, the Twins and the Mall of America! I live with daughter and twin kitties, not far from my son.

Born and Raised:

Born in Ohio, whisked away to New York, and then off to Oklahoma.

Places I've lived:

Do we have time for this? Here goes ... Ohio, New York, Oklahoma, Connecticut, Washington, D.C., Virginia, Texas, California, Florida, Minnesota. Don't ask me for my favorite, I love them all!

Style:

A little eclectic, a lot of color, some whimsy, lots of flowers, and tons of bling. I LOVE to create cards and gifts.

Proudly Designing for: 

SVG Attic, Samantha Walker, Die Cut Crazy Magazine, Imagine Crafts, Want2Scrap, Deco Art

My Blog: 

My Card Party - Cards, Gifts, Recipes, and more


Favorite Design:

Whatever I'm working on currently, is my favorite! Right now that's Easter. I had just gotten some fun new Summer papers from Echo Park that I was DYING to play with, and fortunately, polka dots are perfect ALL YEAR LONG.

I picked an SVG Attic Fall Kit - Autumn Splendor -  (yeah, I'm making my way through the seasons!) and played with the Bucket file and 3d Mums. I made two buckets... why not?

The first bucket I filled with crinkled paper grass and some adorable carrot eggs I found at my local dollar store. I reinforced the handles by cutting duplicates. I added a little more strength to the sides by nesting white panels behind the patterned paper. I filled the carrots with some Reese's Peanut Butter eggs and I was over the moon to have some leftovers. I polished those off! This bucket is for a friend's little man.


On my second bucket (fashioned the same way), I created 8 mums and matching leaves, and hot glued them to pen caps. I chose to attach them to the caps so if the pens wear out, they can be put on new pens. I made this for the bookkeeper's office at work, where they can never seem to hang on to their pens - these bloomin' pens will most definitely be returned now!

The centers are dotted with matching paper and punched with an Epiphany Crafts Punch. I used an Epiphany acrylic circle on top as well. The leaves were coated with Shimmer Texture Goosebumps and then inked with StazOn ink. This makes them shiny, a little more realistic, and a little more durable.


While I had this fun patterned paper out, I pulled out the SVG Attic Hop To It Kit and used the bunny head, eliminating the body and basket. Was it the Red Queen who was always threatening her subjects with "Off with his head" ??? I promise, it was painless!

I used the Offset feature in the my Silhouette Studio software to outline Bunny's head and ears. I  inked the edges and his ears with Radiant Neon Electric Coral ink. I doodled some accents with a Memento marker. I added whiskers with some craft wire sandwiched between two pieces of scrap paper and some hot glue. I think nobody will be pulling off his whiskers any time soon. I used a little Shimmer Texture Goosebumps on his nose - healthy rabbits have shiny noses, right?

I finished Bunny off with a bow - bits of twine tied together with a pretty little paper flower and matted him on some more patterned paper on a matching cardstock card base. This card is for my assigned patient in the Chemo Angel's program. I hope she likes it!


Don't be afraid to use seasonal kits all year long, or take bits and pieces from other kits and try something new. You might just be delighted!!!

I'm excited to meet all of you and share my obsession love of digital die cutting!

Thanks for joining us today.


Get these SVG Attic Kits here:

Project Supplies: Cardstock, Patterned Paper (Summer Fun from Echo Park), Craft Wire, Markers, Ink, Shimmer Texture Goosebumps, Twine, Flower (Wild Orchid Crafts), Adhesive
Project Tools: Silhouette Cameo, Designer Edition Software, Trimmer, Wire Cutters, Hot Glue Gun