Pages

Showing posts with label Silhouette Cameo 3. Show all posts

Wednesday, February 21, 2018

Steampunk 'Once upon a Time' book

Hello all! I-team member Sonja here with my newest project. A few weeks ago, I made a Steampunk Top Hat that I posted to my own personal blog, Sugar Bean Cards. I had some left over supplies and decided I needed to do a matching book!

I decided the Love Stories 3d book file would be perfect to accomplish my goal. Once I had my file picked out, I grabbed some Tim Holtz trinkets, his Lost and Found stack, and (3) sheets of Bazzill's Milkshake cardstock to get started.
With the Walnut Stain, I threw some ink around the books edges to distress it a bit.

Next, I grabbed a Darice clock embossing folder and my Sizzix Big Shot to emboss the top layer to my book.

Then I put it all together with my fingers crossed that it would turn out somewhat decent!

On the background paper, I took it outside and burned the edges. My husband asked me what in the world I was doing outside (it's freezing here). I told him burning paper. He just looked at me like I was crazy, shook his head, and mumbled something about he should've guessed that that was what I was doing. Well come on now honey, I really should never be left unsupervised.


  I love the spine on these book files.
For the paper gears, I cut them on white cardstock and then used some distress spray to get the colors on them. 


 Materials Used: 


  • Tim Holtz
    • Lost and Found 12 x 12 double sided stack
    • Time Pieces
    • Long Fasteners
    • Sprocket Gears
    • Swivel Clasps
    • Walnut Stain Ranger Ink
    • Vintage Photo Ranger Ink
    • Distress Spray
      • Hickory Smoke
      • Fossilized Amber
      • Twisted Citron
  • Bazzill brown Milkshake 12x12 cardstock
  • SnapDragon Snippets Love Stories 3d Book Gift Card Box
  • Silhouette Cameo 3
  • Silhouette Studio~Designer Edition
  • Recollections rose gold cardstock
  • E6000 Industrial Strength glue
  • Aleene's Original Tacky Glue
  • Canon 80D 


Wednesday, February 7, 2018

Mailing some Love

Hello all. I-team member Sonja here with an extra special SnapDragon Snippets Valentine's mailbox to share with you!
I wanted my mailbox to be on a stand so I grabbed the stand from the Angel Nativity set and built the stand.
Using the flowers and vine from the Flowers Vine tag set, I was able to wrap the stand and add some flowers to the box and stand to wrap it all together.
 The flag moves up and down.
 The back of the mailbox is just as detailed.


Materials Used: 

  • DCWVinc. Copper Luxury 12x12 double sided stack
  • SnapDragon Snippets files
    • 3D Mailbox
    • Nativity Angel Stand
    • 3d Flowers Vine tag
  • Recollections Embossing powder
  • Versamark Ink
  • Darice Heating gun
  • Aleene's Original Glue
  • Recollections Heart Brads
  • Silhouette Cameo 3
  • Silhouette Studios-Designer Edition
  • Canon 80D


Wednesday, December 27, 2017

Poinsettia Set

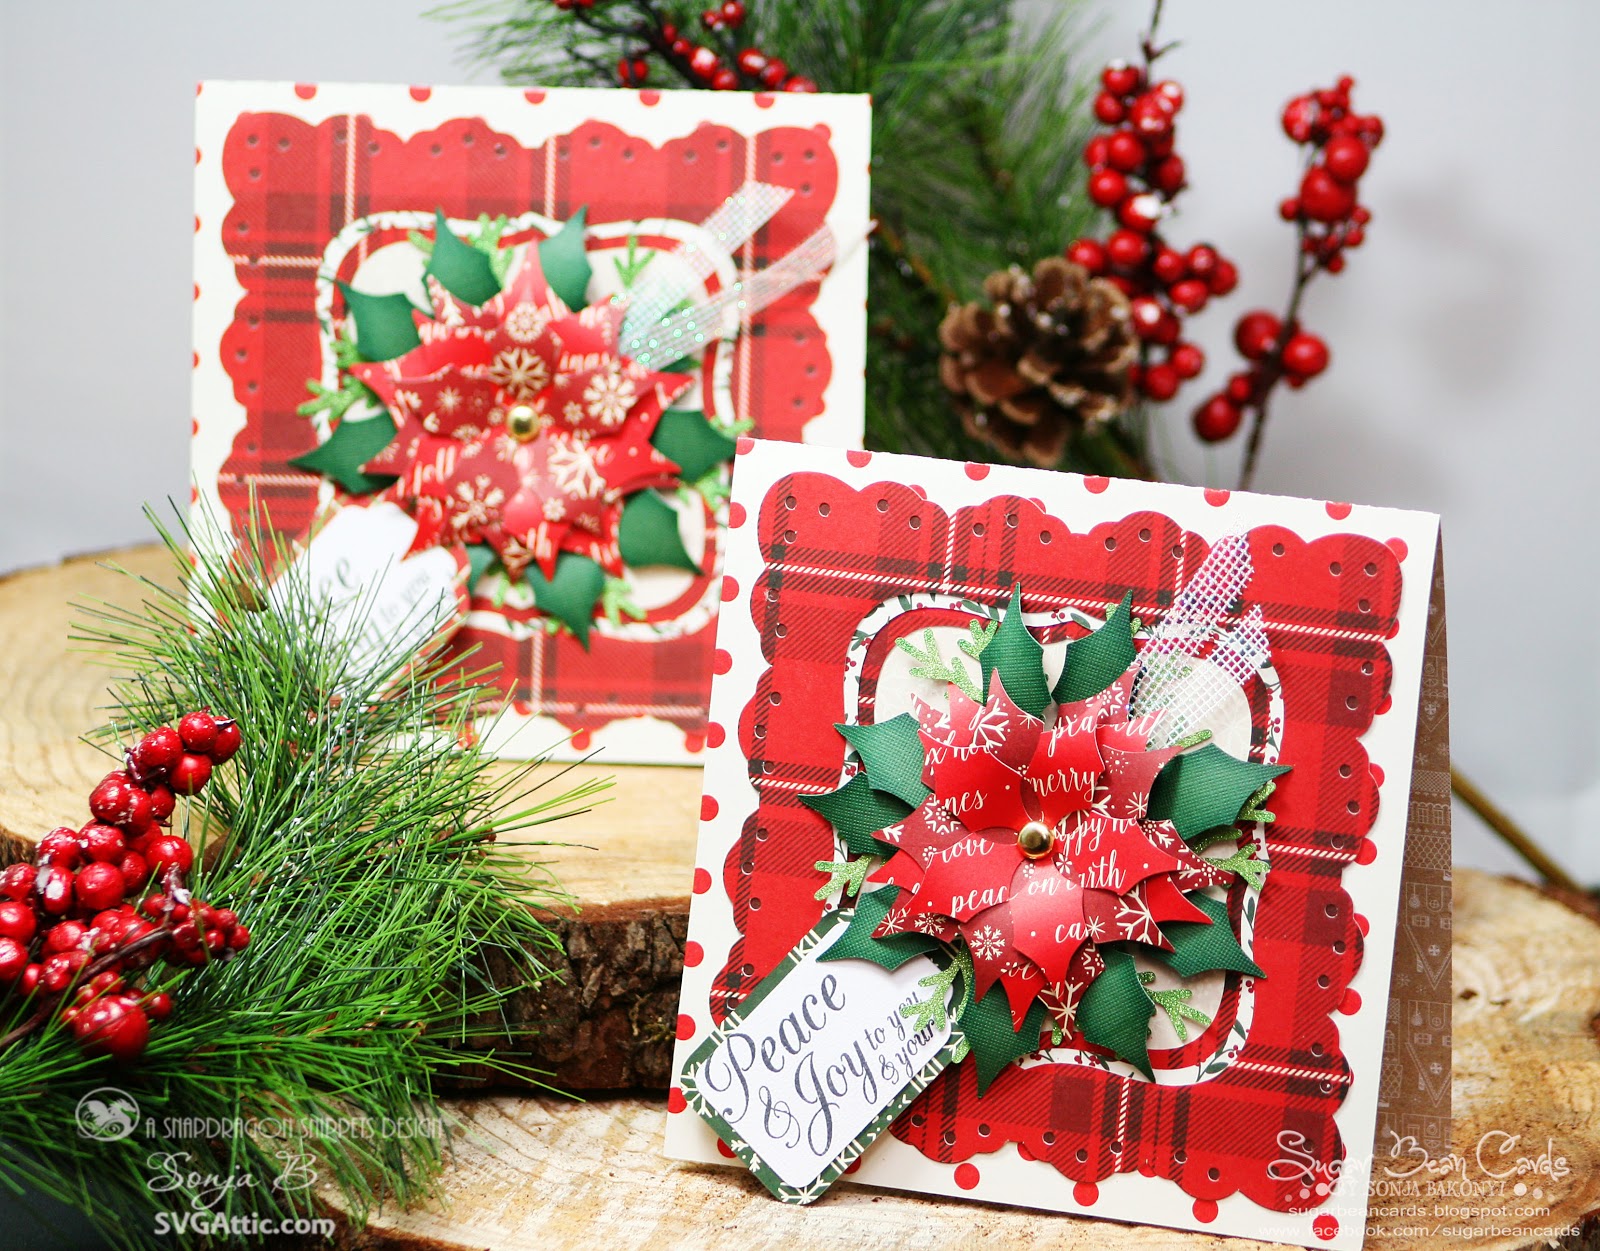
Hello all. I-team member Sonja here with my version of two sets of poinsettia cards from the JGW Poinsettia Passion files.


The two cards I picked from this set were already such great files that I did very minimal additions to it. Other than adding sentimental tags, everything else remains as is. 


By exchanging a few layers of colored flower pedals, I was able to make the same flowers, yet have them be different on each card.
The second set of cards were just as favorable as the first set. Hard to pick a favorite.


  I love the inside of these cards!

Materials Used: 
DCWV Very Merry Stack
Christmas Flip/side stack

Silhouette Cameo 3
Silhouette Studio~Designers edition
Aleene's Original Tacky Glue
Craftwell eBrush
Sharpie markers

Wednesday, November 29, 2017

Christmas Advent Calendar Tree

Phew that title is a mouth full! Hello all. I-team member Sonja here with my take on the newest JGW Christmas Ornament Tree (currently on sale). Now I wanted to do an advent calendar for my kids because like many of you, mine are driving me nuts asking me when Christmas is! Once I saw this new set in the store, I knew it would be perfect to make it into an advent calendar.
JGW Christmas Ornament Tree
I put in a little extra work as everything from the tree topper, stand arms, and the ornaments are double sided to accommodate the numbers for our countdown.

To bring extra highlights to my pieces, I grabbed my Craftwell eBrush and some Sharpie markers to bring some color to the edges. 
My 5-year-old came over while I was doing this and asked "whoa is that magic". Yes, yes it is! 
Other than using the Cameo 3 and the eBrush, I didn't add any other fancy machinery to this project. I wanted to focus on the project itself.
The front of my tree has numbers 1-12
 I have to say the poinsettia ornament was my favorite out of all of them.


 Flip the tree around and there are numbers 13-24 to finish off the tree

Materials Used: 

DCWVinc. Christmas Flip/Side 12 x 12 in stack and Very Merry 12 x 12 in stack

SVG Attic JGW Christmas Ornament Tree file
Silhouette Cameo 3
Silhouette Studio~Designer Edition
Craftwell eBrush
Sharpie Markers, greens, red, and brown
Aleene's Original Tacky Glue
Recollections Gold Brads