Pages

Monday, December 23, 2013

Poinsettia Book Gift Box with Beth

I can't tell you how excited I am to share this project with you!  It is the perfect combination of gorgeous papers with wonderful SVG files.  Without further ado, here is my poinsettia book gift box...
 Don't you agree?  These papers were meant to be made into this book.  Honestly.  They are the from The Paper Parade and the collection is called Reflections Christmas by Echo park.  The chipboard embellishments are also part of that collection.  All of the SVG files in this project are from different collections from SVG Attic.  The book itself is from the Nevermore collection.  Yes, that is a Halloween set, but inspiration comes from all places, doesn't it?  The beautiful poinsettia is from Winter Wishes and the swirls are part of the card that is in the Mom's English Garden set.
On the poinsettia, I inked around all of the edges of the die cuts and slightly bent them in the middle to give the leaves and petals a more realistic look.  For the center I went around the outside of the circles with Platinum stickles and then added glossy accents to them.  I added self adhesive rhinestones to the swirls for a little bit of sparkle.
 To break up the binding, I used some simply red rumpled ribbon, chipboard embellishments and a key that was tied with twine.
 The best part is that the book is a gift box!  This is a view of book opened with a surprise inside!  I hope you have enjoyed this as much as I did making it.

Have a wonderfully crafty day!
Beth
Beth's Beauties

Thursday, December 19, 2013

DVD Gift Box with Beth

Happy Thursday everyone!  Today I am sharing how easy it is to dress up a gift of a movie.  This Christmas, my boys are getting the movie "Planes" (Shhhh....don't tell them!).  Of course I could have just wrapped it in wrapping paper and called it good, but why settle for good when you can have great?  LOL!  I used the DVD gift box from the Stocking Stuff collection at SVG Attic.  I cut all the layers at the imported size and used Disney Cars papers for the whole project.
For the front I used the negative die cuts from the inside window but flipped one of them over to get the colors I wanted (my paper was double sided).  To get the blue to shadow the cream, I just cut the blue piece directly down the center and adhered it offset on both sides.  I inked all the edges of the cuts with brown chalk ink to add dimension.
This beautiful bow is from the Make A Wish set.  Doesn't it make the perfect bow for a package?  I also cut this at the imported size and it fit very well on this package.  Actually, this bow is one that you could make at any size and add it to add a very personal touch to your gifts even if they are wrapped with wrapping paper!
Last but not least, a peek at the details I added to the front, sequins, embroidery floss, and a tag.  This tag was from Holly's Holiday Boxes.
This week SVG Attic released a new set called Winter Fun Photo Props.  Wouldn't this be so fun at a Christmas party?!!
To get this set free, add a minimum of $9.98 to your shopping cart, then add this new set to your cart and use the coupon code FREE on step two of the checkout process!  PLUS all of their SVG's are 50% off right now!

I hope you have a wonderfully crafty day!

Beth
Beth's Beauties

Thursday, December 12, 2013

Bread Gift Box with Beth

I love to give my neighbors something home-made for Christmas.  I know it is something that is very appreciated and I love making crafty things, so it is a win-win gift :)  This year I knew I wanted to make some kind of a bread to give, but couldn't decide on which one.  So I made the bread holder first using SVG Attic's Holly's Holiday Gift Boxes.  I finally decided to make Cinnamon Slice bread from the Rhodes website.  I will include the recipe below for anyone who is interested in trying it.  The bread gift box fits bread from a large 9"x5" loaf pan perfectly!
 I then made a tag using the rosette and tag layers from the gift card holder box in Holiday Cheer Gift Boxes.  I added another tag layer to the back of the rosette to write a little note on for my neighbors.  To finish it off, I wrapped the bread with rumpled ribbon, added twine to the tag and it was done!  I also used brown chalk ink to go around all of the corners and edges of the box.
Let me tell you, I made a loaf of this bread for my family as well and oh my goodness...it is HEAVENLY!  I will be making it again very soon, but I'd better make more than one loaf because that was inhaled pretty fast LOL!

Here is the recipe for the bread:

Cinnamon Slice Bread  (originally from the Rhodes website)

1 loaf frozen bread dough, barely thawed
1/3 cup butter, melted
1/2 cup sugar
2 1/2 teaspoons cinnamon

Glaze:
I just mixed milk and powdered sugar to get the consistency of glaze I wanted :)

Instructions:
Slice loaf into 24 thin pieces. Combine the sugar and cinnamon and mix well. Dip each dough piece in the melted butter and then in the cinnamon sugar. Line them up in a sprayed 9x5-inch loaf pan, each piece on it's edge, to make a loaf shape (I staggered mine from side to side so there was enough room in the pan). Cover and let double in size. Remove cover and bake at 350°F 20-25 minutes. Cool in pan 5 minutes and then place on cooling rack. Combine glaze ingredients and drizzle over warm cinnamon slices.

I hope you have a wonderfully crafty day!
Beth

Thursday, December 5, 2013

Christmas Projects with Beth

December is upon us!  If you are like me, you may be scrambling to try to figure out what gifts to but loved ones, how to wrap them, what cards to give out, and the list goes on!  Relax...I am here to recap a few Christmas ideas that I made earlier this year and hopefully you will gain some inspiration from them. All of these projects were made using files from SVG Attic.


To find all the details on these projects, click on the name directly under the picture and that will take you to the specific blog post.  If you would like more Christmas ideas, go to the SVG Attic Christmas  page for more inspiration!  As always, if you make something from SVG Attic files, we would love for you to share it on our Facebook page.

I hope you have a wonderfully crafty day!

Beth

Thursday, November 28, 2013

Poinsettia Wreath Card with Beth

Good morning!  Beth from Beth's Beauties here, and I am so excited to share this card with all of you today!  As soon as I saw SVG Attic's Winter Wishes SVG kit, I immediately fell in love with it and have been brainstorming ways to use it ever since.  I don't usually hand-make the Christmas cards I send out because I get photo cards of my boys made so everyone can stay updated with them :)  Plus it would take a long time for me to make 60-70 cards.  However, I make exceptions for a few people and this card happens to be going to my Husband's grandparents.  His grandma has the most gorgeous poinsettias that she keeps alive year round.  Without further ado, here is the card.
The card base itself is from the All At Sea set at SVG Attic.  It is the perfect shape to compliment the wreath.  It is A2 in size.
The wreath itself is from the Winter Wishes set.  I imported all of the wreath elements and sized them all at the same time so the wreath base was 4" wide.  The banner is one that I just cut by hand.  I stamped the sentiment on a thin strip of cardstock and folded it, then flagged the ends.  I used brown chalk ink around the banner.
Here is a close up of the beautiful poinsettias on the wreath.  Aren't they so realistic?  I used white chalk ink around the edges of all the layers.  I used Christmas Red Stickles on the top layer to add a little sparkle.  They are popped up with foam tape from the wreath base.  I added an adhesive pearl to the center of each to finish them off.
 I decorated the bottom using rumpled ribbon, some hemp twine and a jingle bell.
 And last, but not least, the inside of the card.  I colored the small elements with markers and added a small amount of Platinum Stickles.

I hope I have inspired you today with my card!  If you are in need of these files or any other SVG Attic files, now is the time to get them.  They are only $1 per set right now!  That price is only good through Thanksgiving Day (today), so don't wait!

Tuesday, November 26, 2013

Mums a Plenty with Jearise

Today I am showing another project I made for the teacher's lounge as a decoration and then had a drawing and gave it away. I was in the checkout line at Marshall's when I saw this awesome big mug. The price was right so I just had to grab it. 

Once it was home, I decided I needed to give it something special so I filled it with a fall bouquet of paper mums from SVG Attic. I received lots of compliments on the flowers and you can certainly see why. The flowers were made from the Autumn Speldor Set. I embossed the leaves and added a touch of Stickles glitter glue to the center of each flower.


Thanks for joining me today. Jearise :)

Monday, November 25, 2013

Thanksgiving Banner with Jearise

I can honestly say I am thankful for everything that has happened in my life. The good and the bad. I feel the bad has made me a stronger person and the good has made me a kinder person. I have learned through my mistakes to love life and ALL people and to great everyone I meet with a smile. 

This week I want to reflect on Thanksgiving and some memories from my past and hopes and dreams for my future and I hope you will join me. I'll also be showing off some of the things I have been working on for Thanksgiving as well.

THANKFUL FOR TEACHERS

Each month at our elementary a great group of parents come together with the help of the PTO to do nice things for the teachers so that they know they are appreciated.

I decided last month that each month I would make a banner to hang in the teacher's lounge with a holiday theme. Last month was Halloween and this month is Thanksgiving. I showed the Halloween banner on an earlier post and you can click here to see if but the Thanksgiving banner is here today for you to look at.

I had to take individual pictures of each section because it was hanging in the teacher's lounge and I  couldn't get a good whole picture. I apologize for that and next time will take the pictures here at home.


The photos are in the order that the banner was made. I just love the way this banner turned out and it wasn't that hard to make either. All the cutting file sets came from SVG Attic

Maple leaf rosettes are from one of the newest cutting file called Autumn Splendor.
3D pumpkins that graced both ends are from the Fall Celebration Kit. 
Family and Friends caption is from the Thankful Captions set.
The caramel apple and apple pie are from the Apple Picking set.

Four sets = one easy yet beautiful banner.

I look forward to seeing you tomorrow with another Thankful creation and story.

Thursday, November 14, 2013

Turkey Treat Dispenser with Beth

Hello everyone!  Are you making Thanksgiving preparations like I am?  I decided to make a turkey treat dispenser using SVG Attic files that will be a perfect addition to my Thanksgiving table. The box itself is from the Fun Favors collection.  I used paper from DCWV's Playtime stack.  I thought the colors on that paper really had a fall feel to it.
I think that turkey is adorable :)  It is from the Thankful Friends collection.  For the tail feathers I used BoBunny double dot cardstock, and the eyes were stamped with a Peachy Keen stamp.  That green ribbon is from Lovebug Creations.  I used brown chalk around all of the die cuts to add more dimension.  I couldn't help myself and added glossy accents to the turkey's beak waddle and feet.
 On the bottom part of the dispenser I added the "Thankful" caption from the Beautiful stamp set from Paper Sweeties.  Three buttons, a little jute cord and it was ready to go!
As soon as my boys saw this, they fell in love with it...playing with it, gobbling down the M&M's...so if you have young kids, this is sure to be a hit with them at your Thanksgiving table too!

I hope you have a wonderfully crafty day!

Beth
Beth's Beauties

Monday, October 28, 2013

Versatile Borders by Jearise


 Today I am going to go back in time and use one of the earlier sets to make a project. I used Erin's Scalloped Trims to make this bookmark. 


Erin's Scalloped Trims


I selected a scalloped border and took it into my eClips eCAL cutting program. I duplicated one of the borders and then flipped it. I made a rectangle that was 6 inches long and 2 inches wide. I placed the scalloped edges on each side of the rectangle so they overlapped and matched up on the ends. I then did a select all and union and there was my bookmark.


These Erin's Scalloped Trims are very versatile for many different crafting projects besides making a bookmark you can also use them for a border on a card or tag.

Thursday, October 24, 2013

Fall Leaf Wreath with Beth

If you are looking for Lorby's Ghost Blog Hop post click HERE.

Hello, this is Beth from Beth's Beauties and I am back with another design team project.  If you haven't seen the latest sets that Jessica has created, you are missing out!  They are gorgeous!  I combined the last two, Autumn Splendor and Winter Wishes with Thankful Captions to make this project.
From the Winter Wishes set, I made the wreath stand and the background of the wreath at the imported size.  The wreath stand is made with dark brown cardstock and has yellow and green rumpled ribbon wrapped around the base.  The background layer of the wreath was cut with kraft cardstock twice and glued together for additional support since I knew I was going to be layering on all kinds of pretties :)
The leaves and their stems were cut from the Autumn Splendor set.  The green leaves were cut at 7", the red and yellow leaves were cut at 6" and the brown and orange leaves at 5".  They are all distressed with brown chalk.
 I didn't want to cover up those beautiful leaves too much so I opted to add a banner in the center of the wreath.  I simply cut a piece of cardstock 2.75" tall by 11'' wide and rolled each end in the opposite direction.  The sentiment is from the Thankful Captions set.  It was cut at 2.25".
The embellishment on the banner was a bow of green rumpled ribbon, trendy twine and buttons that matched the leaf colors.  All of the patterned paper was from DCWV's Amber Autumn stack.

If you liked this project, head on over to SVG Attic and see what files they have!  Plus their files are 75% off for a limited time, so it is the perfect time to pick some up.  This is their newest kit, Winter Wishes.  Isn't it gorgeous?
To get this set free, add a minimum of $9.98 to your shopping cart, then add this new set to your cart and use the coupon code FREE on step two of the checkout process!

I hope you have a wonderfully crafty day!

BOO! Oh sheet! It's a ghost blog hop.

Boo! Oh didn't mean to scare you and I'm hoping you'll join us today for a blog hop hosted by Lorby's World and sponsored by us here at SVG Attic. Jearise one of our design team members is hosting the hop and you can begin at her blog if you just joined us.

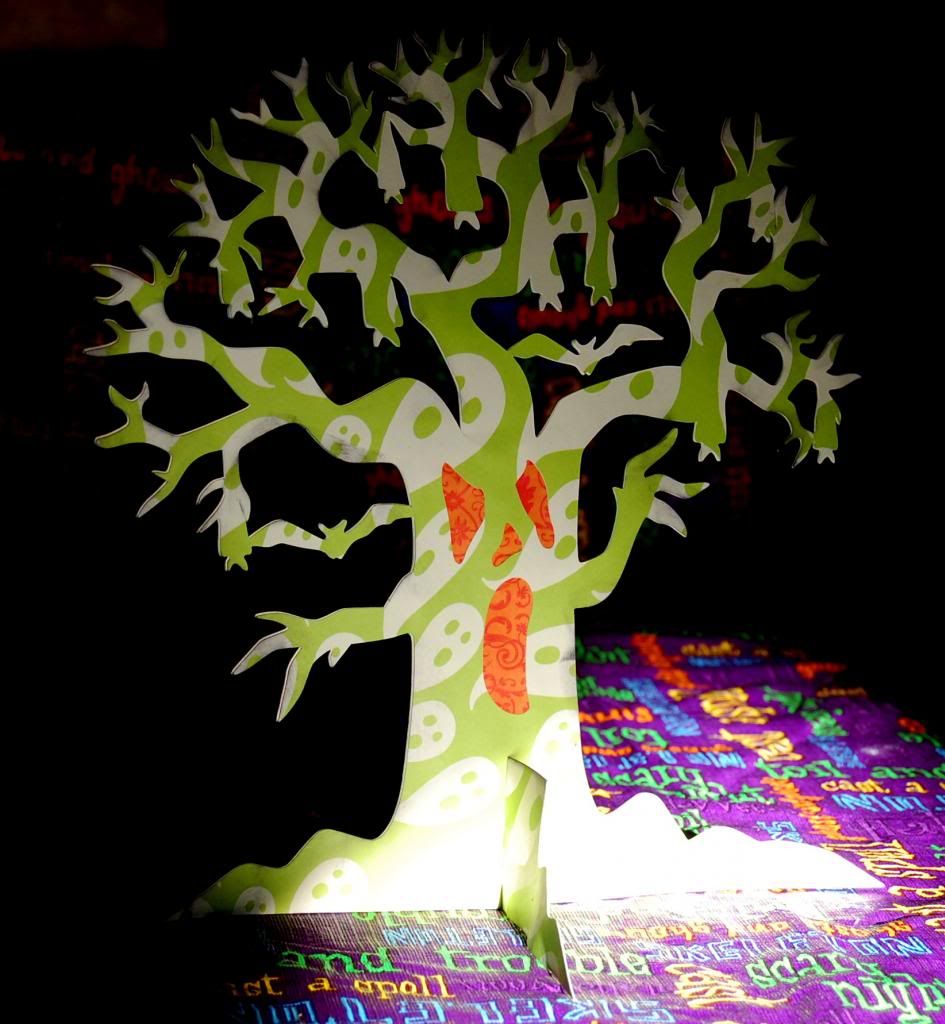
Since Jessica is home taking care of her beautiful new baby, I have stepped in to post for her for this hop. I used the haunted tree from the set Happy Haunt Halloween Party collection to create this center piece.
 Happy Haunt Halloween Party Kit
I found the ghostly paper in K & Companies last year Halloween stack and though it would be fun to give this spooky tree some color and some floating ghost to go along with his hanging bats. The Happy Haunt Halloween Party collection is one of my favorite sets but check out all the Halloween sets because there are some to die for if you get my pun.


SVG Attic is having a drawing for a $25 gift certificate to the store and there are three things to do to qualify:

1. Like us on Facebook

2. Become a follower of our blog

3. Leave a comment saying you did the above two things or let us know if you already have done them.

The fine print... There must be at least five comments (participants) before the drawing will take place.

Thank you so much for stopping by and visiting SVG Attic and seeing my project. It is time to float on to Edwina's blog.

Wednesday, October 16, 2013

Welcome Baby Carter!

The owner and designer of SVG Attic finally got to welcome her beautiful baby boy into the world yesterday. Congratulations to Jessica and baby Carter and say "congratulations" I have created this card for them using the Valentine card set - My Valentine.

I just love the elephant from this set! On the inside of my card it says: A baby is a ton of love, laughter and fun.

I think all the little animals in the set can be used for more than Valentine's Day cards. 

 My Valentine

That penguin would look "cool" on a Christmas card. Don't you agree?


Congratulations to the whole Bashaw family on their newest little member.


Monday, October 14, 2013

Baby Boy Onesie Card with Beth

Today I am sharing a card with you that I made for Jessica at SVG Attic.  She welcomed her baby Carter into this world today!  I thought I would surprise her with a baby card made with files that she created :)
The onesie and boat element are from the Baby Boy set at SVG Attic.  The patterned paper is from DCWV's Spring matstack.
I added three metal embellishments to the bottom of the onesie and faux stitching lines to mimic the look of a real one.  Plus I used tan chalk around it to create more dimension.  I also used my swiss dots folder to emboss the white background and the white circle behind the sailboat.

If you like the cuts on this project, head on over to SVG Attic and see what files they have!  Plus their files are on sale off for a limited time, so it is the perfect time to pick some up.  This is their newest kit, Winter Wishes.  Isn't it gorgeous?
To get this set free, add a minimum of $9.98 to your shopping cart, then add this new set to your cart and use the coupon code FREE on step two of the checkout process!

Friday, October 11, 2013

Halloween Banner by Jearise

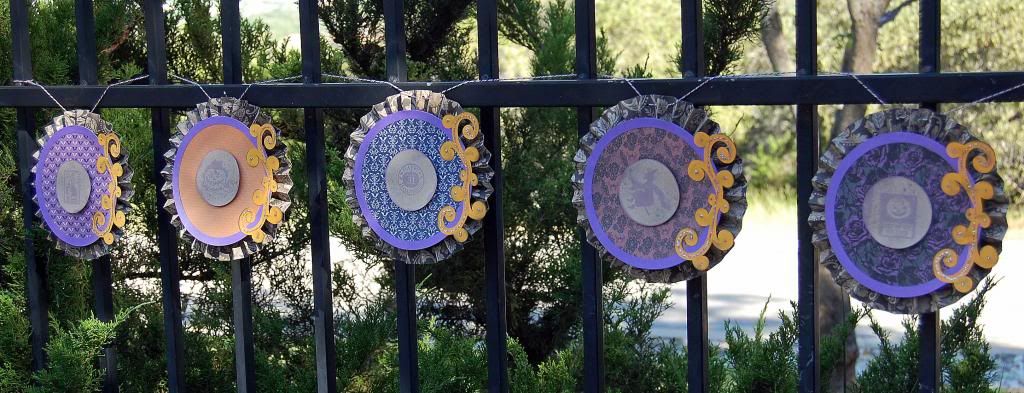
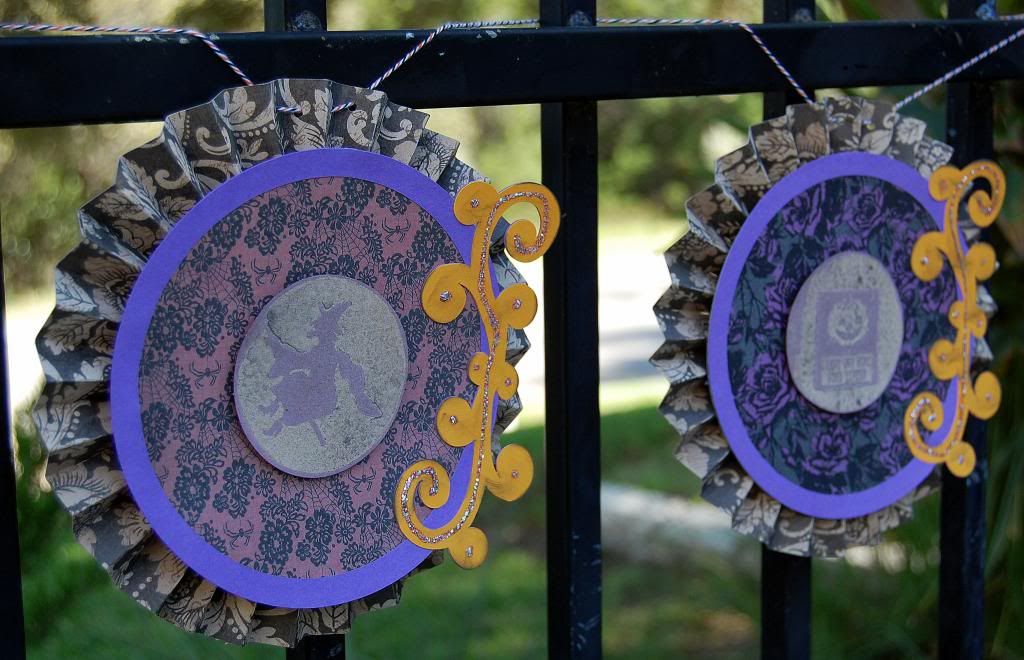
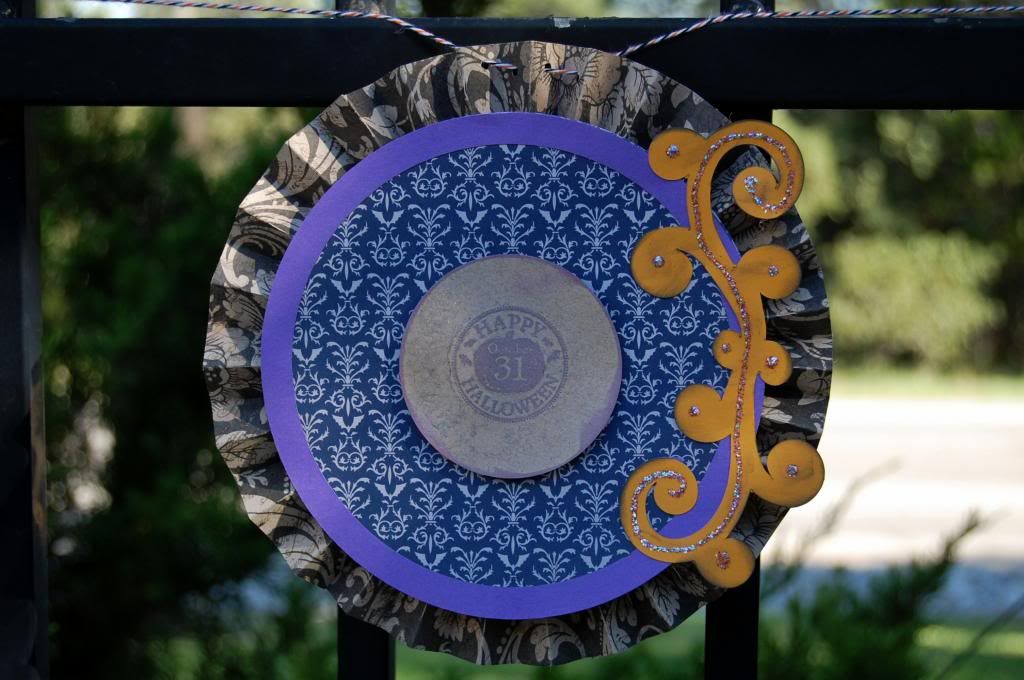
I signed on to make a Halloween banner for a teacher appreciation luncheon coming up so I turned to my SVG Attic's files. SVG Attic has a great set titled: Happy Haunt Halloween Party Kit and it has all your Halloween party needs wrapped up in the set from cupcake toppers to this adorable banner that I made.


As you can see, this banner is awesome as well as all the creations in this kit.

Check out the other Halloween files from SVG Attic. There are a lot to choose from.

Thursday, October 10, 2013

4x4 Pumpkins with Beth

Hello everyone!  This is Beth from Beth's Beauties with another project.  Fall is everywhere we look now.  The leaves are falling, the temperatures are cool and Halloween is right around the corner.  Today I have a project to share with you that has no paper on it whatsoever.  Crazy, right?  Don't worry, I was still able to use my Cricut on it, just not with paper :)  I have seen wooden pumpkins like these a lot.  In person, on the internet with several variations of course.  Here is my take on this popular fall decor.
 I cut 4x4's into three different heights and painted them with an outdoor orange paint.  I didn't know if I wanted them for indoors or outdoors, so I used elements that would be okay outside too.  Then I used a combination of brown, yellow and green paint to add the lines on to make them look more like pumpkins.  The dowel sticks that I used for the stems were a little over an inch in diameter and I used my hot glue gun to wrap them with twine.  I added leaves from a bunch of fake leaves I had in my stash along with some wired berries.  Large brown buttons and a bow of twine finished off each pumpkin.
 I made the sign out of a very thin board that just so happened to be in the garage calling my name for this project :)  The Happy Harvest was cut from tan, olive green, yellow and burgundy vinyl.  The cutting files for the words were from the Thankful Captions set by SVG Attic.  They were a perfect match for this project!

The embellishment on the sign is almost the same as on top of the pumpkins, except I added some brown, green, and yellow rumpled ribbon.  

Then I just couldn't help myself and had to see how they would look in Halloween mode...and they turned out cute that way too! 
 
I simply slipped the sign off of them and added black vinyl jack-o-lantern faces.  The faces are from the Pumpkin Patch SVG collection at SVG Attic.  The vinyl is removable and it will peel right off once Halloween is over.  I will put the sign back on and these will be gracing my house until Thanksgiving is over!

If you like the cuts on this project, head on over to SVG Attic and see what files they have!  Plus their files are 50% off for a limited time, so it is the perfect time to pick some up.  This is their newest kit, Winter Wishes.  Isn't it gorgeous?

To get this set free, add a minimum of $9.98 to your shopping cart, then add this new set to your cart and use the coupon code FREE on step two of the checkout process!

Also, if you make anything with SVG Attic files, we would love to have you share them on their Facebook page!

I hope you have a wonderfully crafty day!