Pages

Monday, April 30, 2018

Mother's Day

FTC disclaimer: I received some of these products for free but was not compensated for writing this post. To view my complete disclaimer, click here

Mother's Day is among us! I-team member Sonja here with a quick little gift set for a mother.

I started with the Tulips boxcard from SnapDragon Snippets. I decided that it needed a little something more though so I made a little pot with six tulips in it.
I stuck pretty close to the original design on both the boxcard and the pot.
The only change I made to the boxcard was swapping out the 'bloom' sentiment for a 'Happy Mother's Day' sentiment.
 Next I cut out the Flower Ball Topiary 3D Pot file.
And filled it with some 3D tulips. For the stems of the tulips, I used wooden dowels and floral tape with the leaves from the 3D Tulip set. 

Materials Used: 

FTC disclaimer: I received some of these products for free but was not compensated for writing this post. To view my complete disclaimer, click here

Sunday, April 29, 2018

Springtime in the Garden

Hello and thanks for joining me today.
I love Spring (yeah yeah I love all seasons) - when the flowers peep out, the smell of the air after the rain stops and the rising of the temperature. Ahhhhh.....
I think I captured all of this in the project I want to show you today. I broke out all my Spring-y papers and decided on the "Botanical Collection" from Prima (an oldie but goodie)
First I made the Hex Watering Can found in the SDS Store and in the Silhouette Design Store:

It's made from AC Cardstock in Vanilla and decorated with the lovely patterned paper. It is SO easy to make....Even without a tutorial :-)
Then I made a flower to go with it:

This is made from AC Cardstock in Vanilla and Mint and the flower is made entirely from the patterned paper and so is the panels on the flower pot. This consists of three files - The Flower 3D Ball Ornament, the Flower Ball Topiary 3D Pot and the leaves are from the Tulip 3d Cubic Three Stems in Crate. (Found in the Silhouette Store: Ball, pot and tulips)
All of these have been downsized by 50% to keep the size ratio.
I added a small red dot from Doodlebug Design to the center of the small center of the flower and added some flower foam plus some Spanish Moss into the pot. I stuck the leaves into the flower foam to keep them in place.
Here's a view from above:

I really love this set - it fits so well together and it doesn't take up much space :-)

Hope you liked this cute set and please don't forget to leave me a small comment on your way out.
New to SVG Attic? Check out these awesome places!

Friday, April 27, 2018

Baby Boy Wardrobe


Hi and welcome, everyone!
 Lisa from The Relativity of Paper and I'm taking over the blog today with my take on this amazing Wardrobe 3D Box.  As soon as I saw this wardrobe I knew I wanted to do for a Baby Shower.  You could easily make an album and place a gift card in the drawer, so cute! 


The paper is About A Little Boy by Photoplay. That adorable giraffe was meant for this wardrobe. While I was putting this together I thought how amazing this would be with a wind-up music box in it, #craftygoals, is all I can say at this point. 


I used a Tim Holtz Ideaology Curio Knob, Ornate Plate on the top, and a Keyhole. I used a lot of the stickers from the paper kit and popped them up with 3D mounting foam. A tiny bow with Trendy Twine. 
How would you use the wardrobe file? 


As always, thanks for joining me and have a great weekend.

New to SVG Attic? Check out these awesome places!
SnapDragon Snippets 
SVG Attic Facebook Page
SVG Attic Fanatics Facebook
SVG Attic Blog
SVG Attic Pinterest

Wednesday, April 25, 2018

A Special Gift Box with Flowers


Thank you for joining me.
Tracy from Idea Closet and my project for the SVG Attic Design team today is a very special gift box. 

We are getting ready for a Bridal Shower for my soon to be daughter-in-law.  
I wanted to make something really nice for the little prizes we will be handing out.

By combining two files, I think I may have come up with the perfect little box.

I started with the 3D Box Window Icing Box.


I increased the size of the box so that the large box base was 11.6" tall and fit perfectly on the mat. (I used the Silhouette, but the same thing could be done with a Cricut)

I also deleted all the extra pieces and cut just the box, window and side accent pieces.

Next I used the Flower Wreath Spring


This time I decreased the size of the wreath so that the wreath measured approximately 5.20"
I deleted the wreath shape and cut the leaves and flowers. 
Because the flowers are now pretty small I cut only the round centers from polkadot paper and deleted the two other middle pieces.


Curl the flowers and the leaves just a little to give them some added fullness.
I also used two colors of daisies to match the colors of the decor.


The  bottom folds together very nicely and the box is now the perfect size for holding a treat or small gift.


To add the finishing touch, cut the "icing" accents from the same color of green used for the leaves.

I am very pleased with how the box turned out and can not wait to fill it with a wonderful prize.
In fact, pretty sure I will be making more!

Monday, April 23, 2018

Sewing Card Set with Beth

Happy Monday morning!  Beth from Beth's Beauties here today with this sewing themed card set.
The files that I use are: Quilt card bi-fold basket, Quilt card bi-fold var star, Quilt card bi-fold peony, and Quilt card bi-fold tea leaf.  The envelope svg is included with the files.
The papers I used for the cards are from DCWV's Hello Darlin' stack.
For embellishments, I used green sequins and white Nuvo Crystal Drops.
The envelopes were cut out of paper from DCWV's DIY Project Stack: Envelopes.  The thimble on the back is a great finishing touch!
I hope you have a wonderfully crafty day!

New to SVG Attic? Check out these awesome places!

Sunday, April 22, 2018

Flowers for the Birthday Girl

I always try to remember to bring a little something for the hostess when going to a Birthday party. It could be flowers or chocolates or this:
 
This is the Box Hex Med with Lid from SnapDragon Snippets (also available in the Silhouette Design Store) that I downsized by 50%.
I made this for my niece who invited us over for her Birthday last Sunday and it was instead of a flower.
It is made from AC Cardstock in Black and Peacock and decorated with Graphic 45s "Floral Shoppe" patterned paper. I used a little resin rose in black as the handle on top of the lid.
In this box I put some Ricola Original Swiss Herb Bon Bons because it matched so well with the floral paper ;-)
 
I do hope she likes these candies (I do!)
I also made her a card to match:
 
This adorable Bloom Flowers 5x7 Card is also from SnapDragon Snippets but can also be found in the Silhouette Design Store.
It's made from AC Cardstock in Banana, Vanilla, Oregano, Peacock, Rosebud, Cranberry, Mustard, Leaf, White and Kraft Wood patterned cardstock also from AC.
All edges are inked with Ingvild Bolme Chalk Ink Pads and the two small wooden dots are from My Minds Eye.
The sentiment say "Congratulations" in Danish and is written with the sketch pen option in the Silhouette Software.
 
She got a Birthday gift as well :-) I love my niece - nothing is too good for her :-)
Thanks for joining me today and please feel free to leave me a small comment on your way out <3
More Spring projects to come soon - so stay tuned ;-)
 

Friday, April 20, 2018

Angel Folk Art ~ with Cyndy G

Hello today I am sharing a project from SVG Attic/Snapdragon Snippets - Angel Folk Art 3D Bell Figure.  This angel figure was easy to put together and she is so cute.  She would pretty in any color.

Angel Bell

She has so many details.  From her wings to the raised heart on the front of her dress.  
This angel is sure to impress.

Angel bell

Thank you for stopping by.

New to SVG Attic?  Check out these awesome places!


Do what inspires you,
Cyndy G

Wednesday, April 18, 2018

Castle Tower turned into...


FTC disclaimer: I received some of these products for free but was not compensated for writing this post. To view my complete disclaimer, click here.

Hello all. I-team member Sonja here with my newest inspiration. While thinking about my next project, a certain vision popped into my mind. I got on SnapDragon Snippets website to see if I could find what I wanted to do. After not finding it, I remembered that I have had the Castle Tower 3D Box file in my library for a year and haven't used it.
Original file 

With a few modifications to the top of it, I was able to make my vision happen. It took me about 2 full days to design and execute it all. Mainly because I kept changing my mind about the roof.

Tower portion: 


Rot Iron Fence: 
Just a few skinny rectangles, circles, and a pentagon for the fence topper was all it took to make the fence. I welded six fences to a hexagon with a smaller hexagon in the middle to accommodate the top tower room to allow a light in it.
Original Top Piece

Modified piece
Roof:
Keeping with the hexagon theme of the tower, I decided to do a hexagon shaped roof. I couldn't find any in my library so I set out to weld a six triangles together and play around with it until I got what I envisioned. 
 Final roof shape after welding and shaping
For the tower portion itself, I wanted to float in some slight color. The best way for this was with a gray sharpie and the Craftwell eBrush. I used Bazzill cardstock for this project because it's a really sturdy product and I didn't have to double up on walls or anything to hold its shape. 

After floating in a bit of color detail, I ran the tower walls, base, and steps I created through my Sizzix Big Shot with a Darice brick embossing folder

 Next, for the tower top I wanted to have the clear plastic just for extra detail. The best way I have found to adhere the plastic to paper is by using my Xyron Creative Station Lite® . 

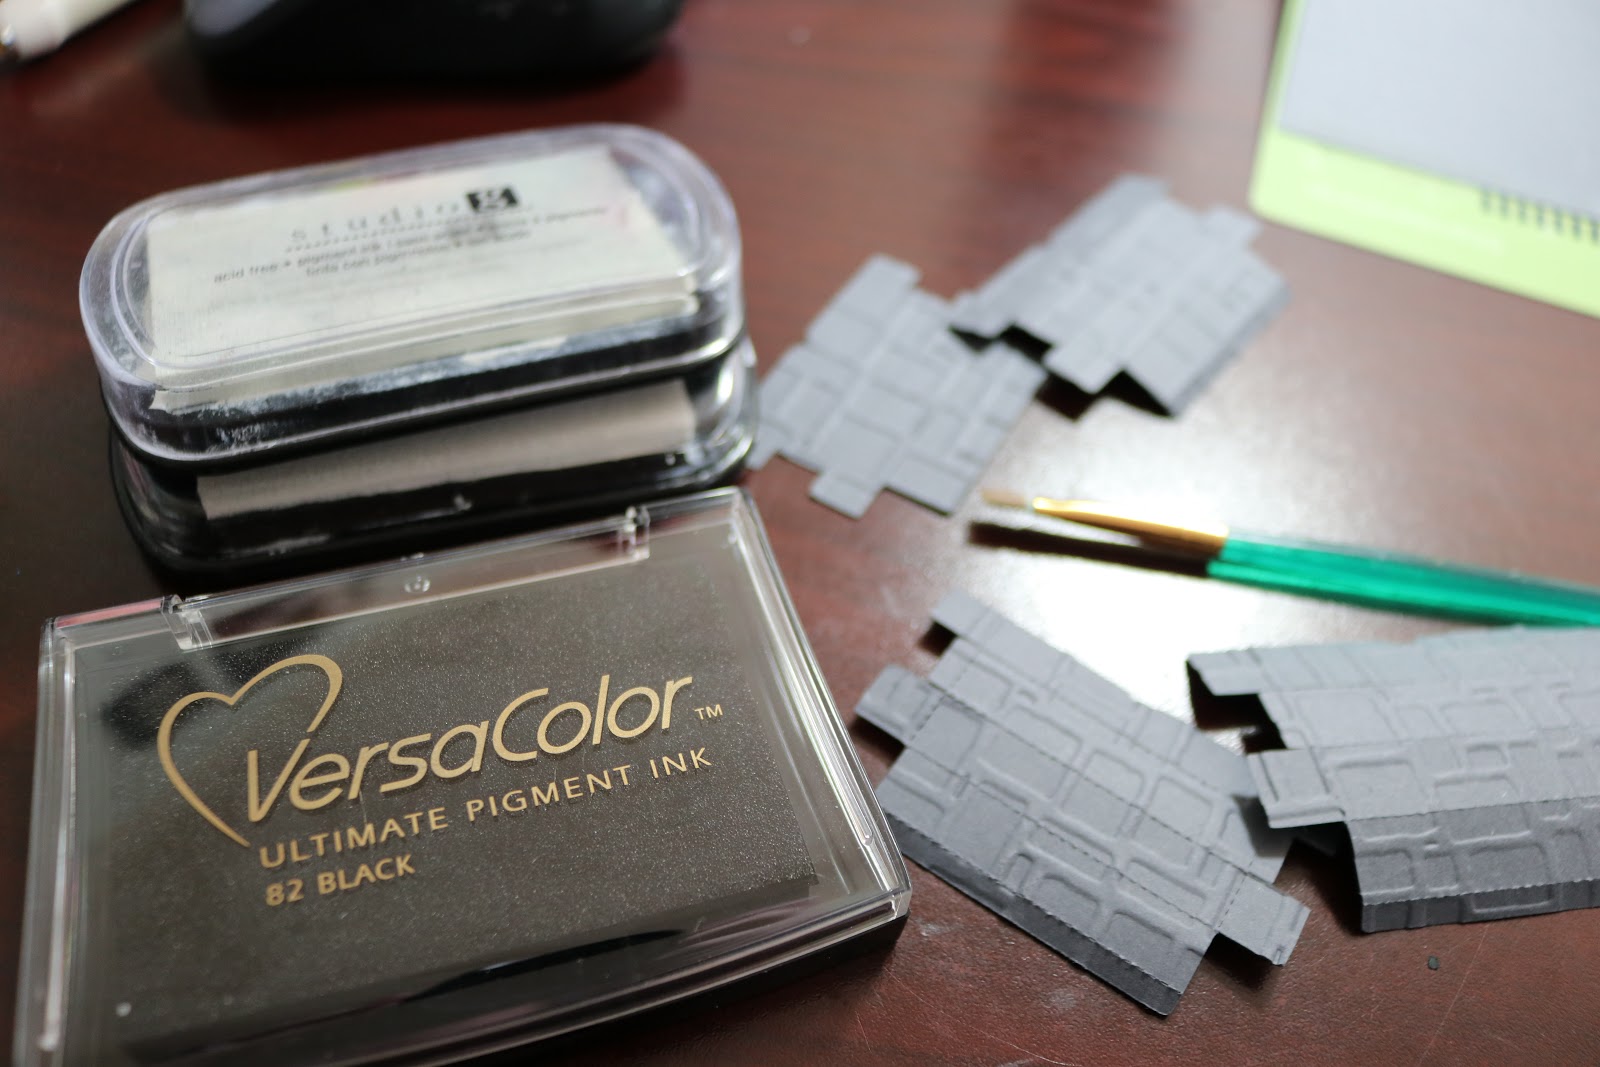
For the steps, I simply took some rectangle boxes I had in my library, downsized them to what I needed, ran them through my Big Shot for the embossing, and dry brushed some ink on them to make the steps look aged.

Final Product: 
 Turn the light on...

These little lanterns are from the SVG Winter Wishes set. The lantern is much much larger than these little tykes. They are about the size of the tip of a pencil on this lighthouse.


I intentionally did not adhere the top to the tower so I had easy access to the tea light.


Products Used: 
FTC disclaimer: I received some of these products for free but was not compensated for writing this post. To view my complete disclaimer, click here.