Pages

Monday, October 30, 2017

Thank you Cards!

Tanya from Crafting on Caffeine here today. This week I decided to do a few Thank you Cards I pulled from a few collections. I hope you enjoy reading all the details.


The first card is from G is from Gratitude  I love how the colors look together.


this next one is from SDS Harvest Feast. I did put the sentiment at an angle. And then added a bit of a twine bow to it.


The last one is from JGW Bloom.  I also added the Demisional Banner with sentiment to it.


Other products used are the following
DVWV paper
Trendy Twine
Jaded Blossom

Thank you so much for stopping by and check you later!


Sunday, October 29, 2017

Hauntingly Beautiful

.....that is what I think this is.
 
Thanks for joining me today as I share one of my last (as of this year) Halloween projects: The Candlelabra 3D for Tea Lights from the JGW Witches Gather kit from SVG Attic:
 
 
This beauty is made entirely from Black AC Cardstock (and a 1.25" dowel) and is very easy to assemble. The only thing I changed or added, is the extra panels of the arms that I embossed with a Damask Embossing Folder from Cuttlebug and added some Rich Copper Metallique Wax from Prima to all edges and the embossed panels to make it look more old and spooky :-)
 
I made the extra panels by simply making a internal offset of the Outer Scroll arm on my Silhouette Cameo.
 
You will find the tutorial for this file here and I hope you'll have as much fun with it as I did.
 
Thanks for stopping by and remember to leave some comments on the projects.


Friday, October 27, 2017

Witches Gather with Lisa

Happy Friday, everyone! Lisa from The Relativity of Paper sharing one last Halloween project with you for the year featuring the JGW 5"x7" Marquee and Witch Hat 3D Bow Rocker Card from the new JGW Witches Gather Kit


How To
  • Assemble the 5"x7" Marquee following the tutorial over on Needles 'n' Knowledge Blog - Mini Marquee Signs omitting the lights. To cover the holes I used the solid frame (K) and enlarged it to cover the holes, turning the marquee into a frame. Set aside to dry.
  • Be sure to check out the tutorial on the Witch Hat 3D Bow Rocker Card over on the Needles 'n' Knowledge Blog to become familiar with the pieces. The first step is to move piece B, E, F and G to the cutting mat in your design software to reduce the size to fit inside the frame. Once you have the four pieces cut out, assemble the bow (E,F,G), let dry, add 3 layers of 3D mounting foam to the back of the hat (B), adhere bow to front of hat, let dry, then center in the frame and adhere using the mounting foam. 
  • I created a full size Witch Hat 3D Bow Rocker Card to set to the side. The Rocker Card is super simple following the tutorial provided by Jodi, Witch Hat with Bow Rocker Card.


You can find all the details on my blog. 
As always, thanks for joining us today!
New to SVG Attic? Check out these awesome places!
SVG Attic Website
SVG Attic Facebook Page
SVG Attic Fanatics Facebook
SVG Attic Blog
SVG Attic Pinterest

Monday, October 23, 2017

Halloween Cards with Beth

Happy Monday!  Beth from Beth's Beauties here today with these two Halloween cards.  I send out cards to all of my family, so I make several Halloween cards each year :)
Both of these card files are from the SDS Glowing Halloween set.  The haunted house easel card is very detailed, but simple to assemble.  I embellished with a sentiment from APB Happy Halloween stamp set and Skittles inside.
Here is the view of it folded flat for mailing.  The papers I used on these cards are from Recollections' Haunted Manor stack.
I really love the style of this second card!  The flourishes in the web are so pretty.
This is a big card, meauring 6.5" square, so it is sure to make a statement!  I also embellished this card with Skittles (attached with mini Glue Dots) and a bow of Lime Licorice Trendy Twine.
I also added clear glitter Wink Of Stella on the sentiment and spider cuts.

Here is the set that I used the files from:

I hope you have a wonderfully crafty day!

New to SVG Attic? Check out these awesome places!

Sunday, October 22, 2017

You've Been Booed

Good morning :-) Helle here with a quick post to show you the fun I had yesterday with one of the cute Halloween cards from the SDS Halloween Cards kit - the Boo Ghost Card

 
I made the card with AC Cardstock and "Tricky" patterned paper from Authentique.
 
Now this card is so cute as it is but I wanted to add a little extra detail:
 
 
Do you see it? I know it's a bit hard to see on the picture, but I added some colored Chibitronics LED lights behind the Boo banner that turns on by pushing the pumpkin.
 
Now this card is exactly how I want it :-)


Thanks for stopping by today


Friday, October 20, 2017

Cup of Cocoa ~ with Cyndy G

Hello today I want to share with you a cute card I made with files from SVG Attic.  I made the steaming cocoa mug box card from JGW Snowflake Stars.

3d card with cocoa mug and snowflakes

I changed the file a little.  I added a "flap" to the front of the card.

screen shot of computer showing how I made the card

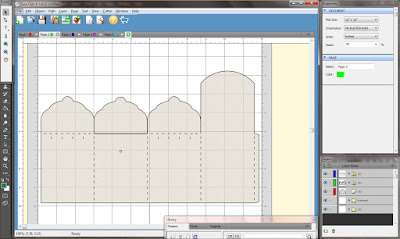
I used the extra optional piece and welded it to the card base.  NOTE:  If you are using Silhouette you will weld the two pieces together.  If you use SCAL (like I do) you will have to break apart the base then select the two pieces and under path you will select "Union".  If you don't break the base apart you will lose the fold lines.

screen shot of computer showing how I made the card

 I added some bling to the center of the snowflakes and used the cutout from the cup on my front flap.  I added a small piece of foam tape to pop it.  The paper is Doodlebug Sugarplums that I had left over from last year.

3d card with cocoa mug and snowflakes


Thank you for stopping by.

New to SVG Attic?  Check out these awesome places!


Do what inspires you,
Cyndy G.

Wednesday, October 18, 2017

Pumpkin Treat Boxes

This past week, I accompanied my daughter and her class to the pumpkin patch. Today's project is inspired by our trip. While we were there, the kids were able to take a hay ride, pick an apple from the orchard, go through a maze, pick a pumpkin, and they finished their day off with fresh pressed apple cider and pumpkin donuts! Which got me thinking, treat boxes...
 These little pumpkin treat boxes comes from the PSD Thanksgiving Character Boxes set.
PSD Thanksgiving Character Boxes

To customize the box sizes, I simple adjusted the width/height of the two larger boxes. 
The bottom of the boxes come out so it can be filled with all sorts of yummy goodness. M&M's, kettle corn, candy corns, cotton candy, and all the other fall treats we tell our selves it is okay to eat!

Materials Used: 

SVG Attic: PSD Thanksgiving Character Boxes
Silhouette Cameo 3
Silhouette Studio~Designers edition
Aleene's Original tacky glue
Sizzix Bigshot
Darice embossing folders

Monday, October 16, 2017

Spooky Halloween Layout

Happy Monday, Tanya from Crafting on Caffeine here!!! I just wanted to play with all of these files so I thought hey let's do a layout!


I wanted to make the ghosts shimmer so I used glitter paper under acetate.


I used pop dots to make the spiders, bats, ghosts, and the middle pumpkin be elevated. 


I used paper from the following companies
Doodlebug
DCWV
Pink & Main

I hope you enjoyed! Please stop back again soon!
 

Sunday, October 15, 2017

Scary Skull

Good Sunday Morning – thanks for joining me on the blog today
 
This week SVG Attic released a new kit called JGW Witches Gather. In this kit I found this totally awesome realistic shaped Skull. I just needed that for my Halloween decorations…..It’s so cool – don’t you think?


It’s made from AC Cardstock in Vanilla. I made some holes in his eyes, nose and ears so light can shine through and covered these with some printed vellum.
 
Just look how amazing he looks in the dark:
 
 
My light is a little too bright but I really love this look.
 
Thanks for stopping by today – remember I love to read all your comments.


Friday, October 13, 2017

Too Cute To Spook

Happy Friday, everyone! Lisa from The Relativity of Paper taking over the blog today with a too cute to spook Halloween card and treat bag


The brand new SDS Halloween Cards Collection is perfect when you need some spooky goodness quick. I love this cute ghost and spider, cut from black and white cardstock, gray cardstock run through my BigKick with a spiderweb embossing folder,  layered on spiderweb pattern paper and finished off with googly eyes. The treat bag is from the JGW Apple Dandy Kit


You can find all the details on my blog. 
As always, thanks for joining us today!
New to SVG Attic? Check out these awesome places!
SVG Attic Website
SVG Attic Facebook Page
SVG Attic Fanatics Facebook
SVG Attic Blog
SVG Attic Pinterest

Tuesday, October 10, 2017

Pumpkins in the Pumpkin patch ~ with Cyndy G

Hello today I am sharing with you some cute and super easy to assemble pumpkins from SVG Attic.  These are from the JGW Pumpkin Grin kit.  I just love how these came out.

Pumpkin treat boxes

These can be used for fall decor or you can fill them with treats and give them out.  They were so quick and easy to put together you could make several in no time at all.  My favorite kind of project.

pumpkin treat box

I used several different patterned papers.  I think these would cute made with some kraft paper too.  The possibilities are limitless.


Thank you for stopping by.

New to SVG Attic?  Check out these awesome places!


Do what inspires you,
Cyndy G.

Monday, October 9, 2017

Coffee Cup Cards with Beth

Good morning and happy Monday!  Beth from Beth's Beauties here with you today to share these fantastic cards.
 I used a file from SDS Coffee Break.  It was meant to be a hidden gift card holder, but I just omitted the center part of the card and also didn't use the shaped card base.  I sized the remaining pieces to fit on an A2 card.  I made this one with neutral cardstocks from Pebbles' Lakeside paper pad.
 The other two were more fall themed since I used DCWV's Sweater Weather papers on them.  I inked the edges with brown chalk ink and crimped the coffee cup wrapper for extra interest.  Embellishments include Chocolate Truffle and Spiced Pumpkin Trendy Twines and sequins.  One of these went to one of my fellow SVG Attic I-Team sisters for her birthday!

Here is a look at the set that I used the file from:
I hope you have a wonderfully crafty day!

New to SVG Attic? Check out these awesome places!

Sunday, October 8, 2017

Too Cute To Spook

Hello and happy Sunday :-)

Today I want to show you the cute Halloween Lanterns I made from the SDS Glowing Halloween kit

 
I wanted them to be cute and not too scary as I am giving them to a special Family School that I attend with my youngest son who has ADHD. This school only has about 8 families at a time - mostly Mother and child and is a place where children who has difficulties being in their own school/class can come and get help with these difficulties.

So I made the lanterns with AC Cardstock in Black, Cricket, Blossom, White and Squash along with patterned paper from Doodlebug's "Boos and Brews" and "BooVille" - these papers are just perfect for this project.....don't you think?


As I know that the lights in  these lanterns will be turned on and off every day and this might cause the bottom contraption to tear,  I adjusted the bottom slightly to make an easier access for the candle.

Here's how and what I did on my Silhouette Cameo:

1. I placed the shape (for keeping the candle in place) on top of the bottom shape and chose "release compound path."

 
2. Then I removed the square and left the circle in the bottom shape.
 
 
3. I then chose "release compound path" on the bottom shape.
 
 
4. I removed the square from the bottom shape and chose "make compound path" on the remaining shapes.
 
 
5. This is what it should look like.
 
 
6. I finally cut out the piece along with 4-5 shapes for the candle-holding.
 
 
This way the candle rests on the table and is easily accessible to turn on and off. Should you want to hang the lantern instead, do not use this method as nothing is holding the candle.


I really can't wait to see the kids reaction to these cute colorful lanterns. Halloween is still a pretty new thing here in Denmark but its becoming more and more normal year after year. Still there is a HUGE lack of Halloween decor and I've taken it on as my personal mission to make and bring in more of it everywhere I go :-D
 
New to SVG Attic?  Check out these awesome places!