Pages

Showing posts with label SDS 3D Cake Box Kit. Show all posts

Sunday, May 13, 2018

Mothers Day in the Garden

Hello, happy Sunday and happy Mother's Day.
There wasn't a shadow of a doubt about what I wanted to show you today as it is Mother's Day. The only thing that teased me, was what to choose as SVGAttic and SnapDragon Snippets has so many wonderful Mother's Day files to choose from.
Not that my own Mother doesn't enjoy the garden, she just has lots of other hobbies but I know a lot of Mothers out there thrive in the green and loves to get dirt under their nails, so I went with a garden theme.
And this is what I came up with:


First of is the 3D Garden Hat that I made from AC Cardstock in Brown Sugar and Straw along with patterned paper from Graphic 45's "Botanical Tea" collection and two small silver colored eyelets.
I also decorated it with some Prima flowers from my stash in coordinating colors and a butterfly also from Prima.
This hat is very easy to make so it's perfect for everybody both beginner paper crafters and the more advanced.
Next is the 3D Garden Spade:


This one is also very easy to make and it's so realistic I fear somebody's going to bring it into the garden for shoveling.
I used AC Cardstock in Vanilla and Bazzill Bling Cardstock in Tungsten along with patterned paper from Graphic 45's "Botanical Tea" collection.
I also tied some pink twine on the handle.
Then I made a flower in a pot:


This is a somewhat fantasy kind of a flower inspired by Hydrangeas.
For the flower itself I used ½ styrofoam ball on which I pinned several small flowers from the Flower Five Petal Leaf Cluster cut out in Graphic 45 patterned paper (Botanical Tea) As flower center I added small sequins.
The ball is then glued or pop-dotted onto a large flower from the SDS 3D Cake Box Kit (without the candle) cut in AC Cardstock in Bubblegum. Then I cut out some leaves from the Flower Five Petal Leaf Cluster in Cricket AC Cardstock and glued them underneath the flower and placed it onto the pot.
The Flower Ball Topiary 3D Pot is made from Vanilla AC Cardstock and decorated with "Botanical Tea" paper. For filler I used some Spanish Moss. Isn't it cute?
This project is for the bit more advanced crafters but I really encourage everyone to try it.
Last but not least I made the adorable Tea Cup 3D Container also from SnapDragon Snippets:


The cup is cut from AC Cardstock in Vanilla and decorated with Graphic 45 patterned paper "Botanical Tea". The Tea Bag Tag is the small in the set and is cut from Graphic 45's paper and decorated with a small chipboard tag from Graphic 45's "Time to Flourish" collection and tied onto the cup with a length of scrap floss. Finally I added a Prima butterfly and filled the cup with sweets (chocolate covered roasted almonds)
This cup is rather large so if you're not into spending a fortune on candy (like I did), you can fill some tissue paper into the cup first for filler.
And all together now :


So what do you think of this project? Let me know in a comment.
Thanks for visiting today - I hope to see you again real soon.
New to SVG Attic? Check out these awesome places!


Saturday, February 18, 2017

Shabby Chic Birthday Cake

Happy Saturday all!  Beth from Beth's Beauties here with you, and today is extra special because it is my birthday!  I decided I would make my very own birthday cake for the occasion ;)
 I started out with a 3D birthday cake file from SVG Attic's SDS 3D Cake Box Kit and papers from DCWV's Country Floral stack.
The three tiers are made with different papers and the flowers match the pink and yellow roses on the middle tier.  The small flowers were created using the Wooly Blossom 5 Petal Flower from SVG Attic's JGW Winter Wonderland set. For those, I cut 2 layers of petals at 1.5" each.  I spritzed them with water, scrunched them and let them dry before assembling.
The cake topper rose is much more full, but it also is created from the Wooly Blossom 5 Petal Flower from SVG Attic's JGW Winter Wonderland set.  I used 8 layers on this one, two of each of the following sizes:  2.36", 2",  1.64",  1.28".  I also misted these with water and scrunched them prior to assembly.
The fun part is that the bottom two tiers are actually boxes that can hold gifts!  I think I am going to have to get some chocolate to hide in these layers to make a stash just for me ;)
I hope you have a wonderfully crafty day!

New to SVG Attic? Check out these awesome places!

Friday, September 2, 2016

Hauntingly Sweet with Lisa


Happy Friday, everyone. Lisa from The Relativity of Paper bringing this hauntingly sweet treat. 
Know anyone having a Halloween Party? This cake would be perfect for your "Hauntingly Sweet" Table. 
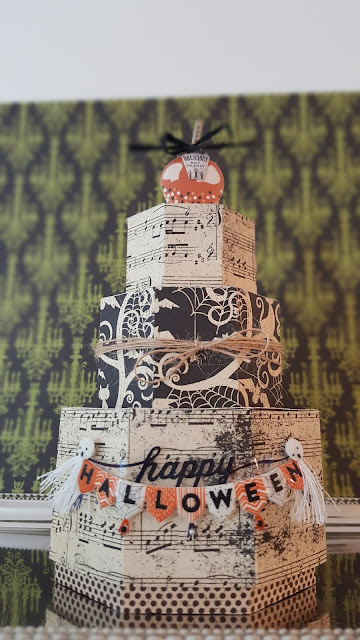
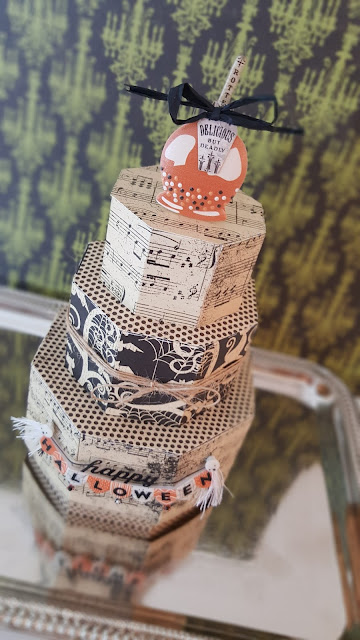
Using the SDS 3D Cake Box Kit, I created this fun take on a three-tiered cake. Who said that cake was just for Birthday Parties and Weddings? Not, me!


This is a picture of a three-tier papercrafted Halloween Cake\

This is a picture of a three-tier papercrafted Halloween Cake

This is a picture of a three-tier papercrafted Halloween Cake

This three-tiered cake is very easy to assemble. By using themed patterned papers and embellishments, it's easy to add your twist to this cake. Set it on your kitchen counter in a tall cloche, add a few more spooky elements for a great Halloween decoration. 
Want to gift a unique Halloween treat? There are two boxes to place goodies in; to gift to your favorite ghoul-friend! 


Be sure to join me at 
The Relativity of Paper.com for instructions and full supply list.


As always, thanks for joining us and we hope you have a fantastic weekend. 


New to SVG Attic?
Check out these awesome places!


Monday, September 28, 2015

My Birthday Cake

Good Monday Morning! Tanya from Crafting on Caffeine And yes it is my birthday today! I was so excited when I realized my day to post here on the blog was on my Birthday!  To make my birthday cake I used 3 different files.  Hope you enjoy!


The Cake is from SDS 3D Cake Box Kit Topsy-Turvy Cake. I used my eBrush to edge all the corners and sides. 


The Candles are from SDS Happy Birthday Page Kit. Once I cut them out I then used my score board to make a quarter inch score on both sides and then used my pencil to curve the paper to make it look 3D. Then I glued the folded edges to the side and glued the flame inside. I did trim the candles a bit to make them all look even.


with Candy in my cake it means I get to have what ever flavor I want. hehe


The 40 is from SDS Nested Numbers I cut 2 pairs and put a pop dot in between to make them be able to stand on the cake like those candle numbers you buy.


Here is the rest of what I used to make my cake complete.
All paper used is from DoodleBug Designs

Wishing you a great day! Thanks for stopping by!