Pages

Showing posts with label gift box. Show all posts

Wednesday, January 16, 2019

Valentine Tote Box


Valentine's can be an exciting time for anyone, no matter their age.
Tracy from Idea Closet and today is my turn at the SVG Attic blog.  I thought it would be fun to make a Valentine's box for holding all your Valentine treasures.

For my project I used the Large Decorated Tote Gable Box.

This box was originally designed for Halloween and used Graphic 45 paper, however, I changed it up a bit and used paper from Photo Play to make a perfect Valentine's day box.


There is so much fun happening with this tote.


My favorite part of the box is the big 3D bow!


For the front of the box, I added a journal block, a tag with stickers from the collection and a bottle pop embellishment with paper from the kit; all tied with matching red twine.


To finish the box; on the back side I cut out a slot for cards to fit in.
Now it can be used at school or  home as a "mail box".

The Large Tote could be used in so many ways besides just Halloween!

Thank you for joining me today and I hope you  find time to create something beautiful this week.


Wednesday, September 12, 2018

Perfect Pumpkin Projects


I don't really love fall. 
Here in Salt Lake, it seams like we get 5 days of fall and then winter hits!

But I do love Pumpkin!


So today for SVG Attic I created 2 projects featuring those beautiful pumpkins.


The first project is the Folk Art Pumpkin Patchwork card.

This is such a pretty card. 
If you love quilts or patchwork, Jodi has some beautiful quilt blocks and patchwork images.


The Pumpkin Block 3D Box, is another fun and easy file.
I made mine a little bit smaller and then distressed the edges.


The best part of this project is its made up of three smaller boxes.
The boxes can be filled with small treats or  gift cards.
Tie the boxes together and give as a gift to someone special.

I hope you enjoy these pumpkin projects as much as I have.
Thank you for joining me today.


Friday, August 3, 2018

Back to School


Hi and welcome, everyone! Lisa, here, from The Relativity of Paper bringing you today's project featuring the cupcake holder from the Sweet Shop Collection. This is one of my favorite Collections from SVG Attic, I love this cupcake holder because as you will see you can use it for many occasions. Today I'm sharing how I converted it into a little red school house perfect for a Back to School gift with supplies. 


When I started this project my intention was to create the school house and then add a few supplies, crayons, pencils, erasers and snacks inside. Of course, as I started creating I decided my school needed a cute desk and knew exactly where to find one, the JGW Campus Capers has this adorable Vintage Desk Gift Card Holder included in it. I sized the desk down a bit because I knew I wouldn't be adding a gift card. 

I started with red 12 x 12 cardstock to create the cupcake box, white cardstock to create the shutters with black cardstock accents.  I used kraft cardstock for the desk and then added accent pieces using the new Echo Park Paper Back to School. 


I didn't want the school supplies just laying inside so I created two side walls by measuring the side sections of the box, creating rectangles with those measurements and adding tabs to the sides to secure the "walls" in place. This created the perfect spot to hide the supplies but leaving me enough room to decorate the inside of the "classroom". 


Class is not complete without a blackboard. I cut a piece of black cardstock and framed it using the wood grain patterned paper from the Back to School kit. I also added stickers from the same kit. 
To create the blackboard cut a piece of black cardstock, using a paintbrush lightly brush white ink across the paper.


Using the same wood patterned paper I created shelves and lined them with fun stickers from the kit. 


I cut out a cute saying from the Back to School paper and used it like a bulletin board. 

 I added crayons, pencils, erasers and two packs of Fig Newtons. Small packs of tissue, a bottle of glue and scissors would be great additions. You could even slide a gift card in there. You could add so many fun things to this gift box to gift a student or teacher. No matter what you add or who you gift it to, I'm sure it will be appreciated. 


As always, thanks for joining us! 


Wednesday, April 25, 2018

A Special Gift Box with Flowers


Thank you for joining me.
Tracy from Idea Closet and my project for the SVG Attic Design team today is a very special gift box. 

We are getting ready for a Bridal Shower for my soon to be daughter-in-law.  
I wanted to make something really nice for the little prizes we will be handing out.

By combining two files, I think I may have come up with the perfect little box.

I started with the 3D Box Window Icing Box.


I increased the size of the box so that the large box base was 11.6" tall and fit perfectly on the mat. (I used the Silhouette, but the same thing could be done with a Cricut)

I also deleted all the extra pieces and cut just the box, window and side accent pieces.

Next I used the Flower Wreath Spring


This time I decreased the size of the wreath so that the wreath measured approximately 5.20"
I deleted the wreath shape and cut the leaves and flowers. 
Because the flowers are now pretty small I cut only the round centers from polkadot paper and deleted the two other middle pieces.


Curl the flowers and the leaves just a little to give them some added fullness.
I also used two colors of daisies to match the colors of the decor.


The  bottom folds together very nicely and the box is now the perfect size for holding a treat or small gift.


To add the finishing touch, cut the "icing" accents from the same color of green used for the leaves.

I am very pleased with how the box turned out and can not wait to fill it with a wonderful prize.
In fact, pretty sure I will be making more!

Friday, March 23, 2018

Gift Box ~ with Cyndy G.

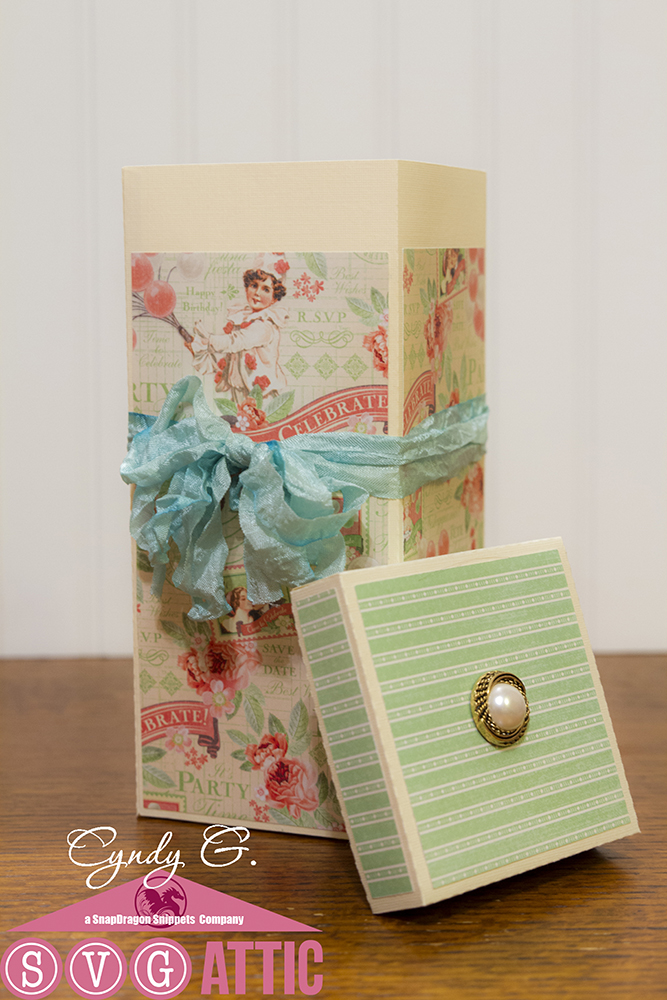
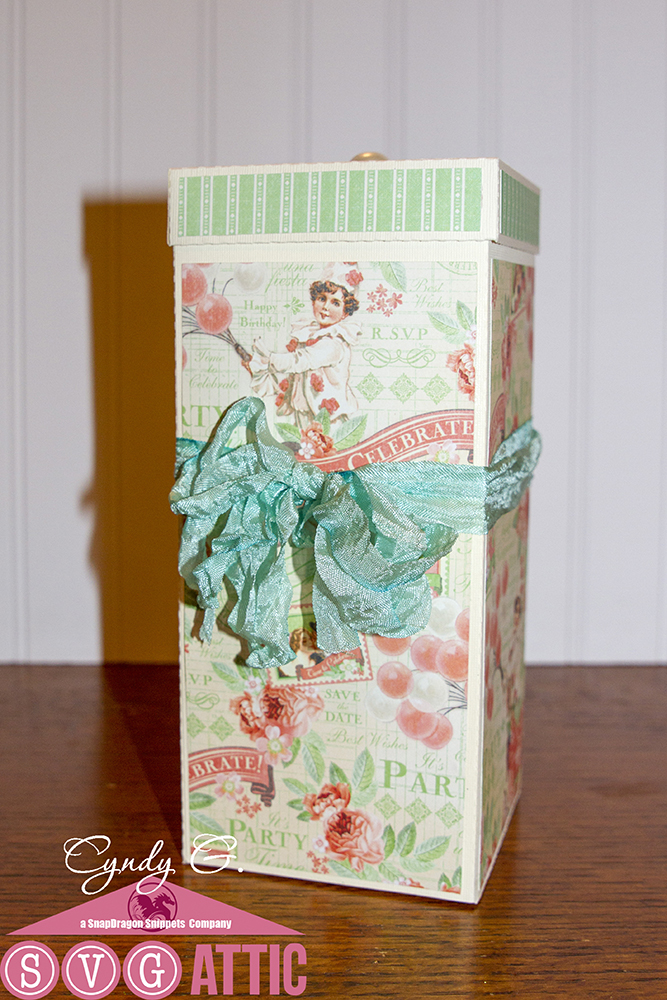
Hello, today I am sharing a pretty box from SVG Attic/Snapdragon.  It is the Tall Box with Lid.  This is a very nice size and it is easy to put together.  It makes a perfect gift box.  You could decorate it for an occasion.  I have used Graphic 45 - Time to Celebrate because I am going to use mine for a birthday.


I used some crinkle ribbon around the box and a button as the accent on top.  You could also use a large bead or a draw pull.  I just love this ribbon!


The box stands just over 9" tall and is 4" square.  Thank you for stopping by.

New to SVG Attic?  Check out these awesome places!


Do what inspires you,
Cyndy G

Sunday, December 10, 2017

The Joy of Giving

Hello and happy 2nd Sunday of Advent
 
Today I want to show you a beautiful gift box I made from the new kit from SVG Attic. It's called JGW Christmas Botanica


The Poinsettia 3D Flower Topped Box is perfect for a small hostess gift or even a Christmas gift.
 
I made the box in AC Cardstock in Rouge, Crimson, Olive and White and decorated it with patterned paper from Swedish Maja Design Paper "I Wish" and Best Creation White Glitter Paper.


I inked all the edges with chalk ink from Prima and sprinkled some Glass Glitter Gold Rush from Finnabair onto the flower center. Finally I added some gold glitter dots to the snowflake.


I can't wait to be giving this one away.....
 
Thanks for joining me today - I still have lots of projects to show you so don't stray too far ;-)

New to SVG Attic?  Check out these awesome places!


Monday, November 6, 2017

Cross Gift Box with Beth

Happy Monday!  Beth from Beth's Beauties here with you today.  I created this elegant gift box to share with you.
I started by making the gift box from JGW Motherly Moments, omitting the window cut on the top of the box and layering the scalloped rectangle frame on the top of the lid.  I wanted it to have an elegant look, since it was for a Confirmation gift, so I used monochromatic papers from DCWV's Silver Leaf stack.  I used Scotch tacky glue for assembly.
I re-sized one of the SDS Flourished Crosses to fit inside the rectangle on the front of the box.  I also created a blackout shadow of the cross.  It was then added with foam tape to the front.
I tied a bit of ribbon around it to hold the box lid on, but left it loose enough to be easily removed for opening the gift.  The gifts fit inside perfectly, and as a bonus, an A2 sized card/envelope also fit inside!  That way I didn't have to worry about the card getting lost or covering up the pretty box :)
I hope you have a wonderfully crafty day!

New to SVG Attic? Check out these awesome places!

Wednesday, July 19, 2017

Memory Box with Tracy

Looking for a great way to store keepsakes or souvenirs?

 Tracy here from the Idea Closet and today is my turn to post with SVG Attic,
 I am so excited to share a great project that is the perfect answer to this question.

Check out this beautiful Memory box.

It is created with the files from the JGW Build a Box collection
JGW Build a Box

There are a lot of options in the collection that make it possible to create all the details on the box.


The flowers are part of the collection and add the perfect touch.


Use Wood Doll Stands (found at Micheal's) to add feet to the box.
Paint them to match the paper.


Here is a side view.


The box has a magnetic closure, sturdy lid and bottom and lots of room to keep your pieces safe.

This project has lots of parts but if you follow Jodi's instructions here, it is pretty easy to understand.

I think I am addicted to these fun boxes and can't wait to make more.


Monday, December 12, 2016

Ho Ho Holiday Santa Candy with Angeline

Happy Monday.
Angeline here to share with you my Christmas scrappy projects!
Can you believe it that Christmas is just 2 weeks away??

I am using the JGW Ho Ho Holiday kit -- which is awesome coz it has a variety of gift boxes in it!
Here is my Christmas Candy (Chocolate) Dispenser and my Santa gift box. 

SVG Attic: Ho Ho Holiday Santa Candy with Angeline #svgattic #scrappyscrappy #jgwhohoholiday #christmas #holiday #candydispenser #santa #giftbox

For the candy dispenser, I decked it with some Christmas papers from Simple Stories and added some flowers on the lid. 

SVG Attic: Ho Ho Holiday Santa Candy with Angeline #svgattic #scrappyscrappy #jgwhohoholiday #christmas #holiday #candydispenser #santa #giftbox

I also added a little "Pull Here" sign :)

SVG Attic: Ho Ho Holiday Santa Candy with Angeline #svgattic #scrappyscrappy #jgwhohoholiday #christmas #holiday #candydispenser #santa #giftbox

Once pulled down, it dispenses some kisses :) 

SVG Attic: Ho Ho Holiday Santa Candy with Angeline #svgattic #scrappyscrappy #jgwhohoholiday #christmas #holiday #candydispenser #santa #giftbox

And here's my Santa gift box up close.

SVG Attic: Ho Ho Holiday Santa Candy with Angeline #svgattic #scrappyscrappy #jgwhohoholiday #christmas #holiday #candydispenser #santa #giftbox

I gave him a twine ball for this hat using some Trendy Twine :)

SVG Attic: Ho Ho Holiday Santa Candy with Angeline #svgattic #scrappyscrappy #jgwhohoholiday #christmas #holiday #candydispenser #santa #giftbox


***

Thanks for stopping by and have a wonderful week ahead
Angeline Choo
blog // facebook // instagram // youtube

Friday, June 24, 2016

Pretty Pineapples with Lisa


Hi, everyone! Lisa from In The Crafting Cave sharing a few pineapple projects with you. Using the pineapple box from the JGW Tropical Haven Kit and the pineapple from the Luau SVG Kit you can make these fun projects for your next summer party!
 Use the pineapple box as your centerpiece and as a small guest gift by adding a small bag of hard pineapple candies. To create the pineapple box I used yellow and green 12" x 12" paper, Scotch glue, hot glue, and sequins. Followed tutorial replacing brads with sequins.


Using the Luau Kit, I created the pineapple cards that can be used for invitations, food labels on the table, and just by adding a strip of 1"x 6" paper you can create a fun napkin ring.  The possibilities are endless.
I used kraft, yellow and green cardstock to cut the pineapple cards.

We love to see what you all create! Share your projects on Facebook at 
SVG Attic Fanatics Group

As always, thanks for joining us and we hope you have a fantastic weekend

Need inspiration? You can find us on 
And be sure to join us on Facebook,

Wednesday, June 8, 2016

Fishing Fun

Fishing Fun For  Fathers  Everyone!


My dad was an outdoors man!  He loved it, year around he was outside.  
His favorite was fishing.
He taught his sons to fish.
He took my mom fishing on their honeymoon.
He also taught his 4 girls to fish.

When I grew up, I married a fisherman and he has taught not only our son but our 5 daughters as well to love the sport.

When I saw these fishing files I just couldn't resist making them.


This fishing vest is great for fathers day, birthday (or even mother's day?) 
It is a large card with lots of fun details and even comes with its own envelope.
Add some brads for the buttons and a little kite string tied to the hooks.
Perfect!
Lets see I need one for my husband, one for my father-in-law and one for my son-in-law.


The jumping fish box is made for a gift card but it is big enough to fill  with some
hooks, lures, fishing line,  or other small gift.

I love all the layers that make the fish look so realistic.  

Both of the files can be found at SVG Attic in the  JGW Gone Fishing Kit.


To finish it all off how about a fun fishing hat that is actually a box.
The hat comes with a blank tag or one that says dad.
It can be filled with goodies or another small gift.

The 3D fishing hat can be found at Snapdragon Snippets or in the Silhouette Store. 

I hope you will try one of these files for your favorite fisherman (er- person).


Visit my blog for more ideas and projects.