Pages

Monday, January 30, 2017

Happy Birthday Ashley!!!

I'm so so excited to share this post with you today! Today is my oldest daughter's 20th birthday as well as my day to post here, I'm Tanya from Crafting on Caffeine! So sit back and enjoy!
I made a whole cake using the 8th cake slice from JGW Take the Cake


I used paper from Doodlebug and DCWV 


I used my Cut n' Boss to emboss the layers on the sides of each slice


In each slice is candy for each person that the slice goes to.


Here is the birthday girl with her friends. Fun times were had by all!


Thanks for stopping by and checking out my post. Hope you stop by again soon!


Friday, January 27, 2017

Another Frozen Birthday ~ with Cyndy G.

Happy Friday, thank you for stopping by.

Today I am sharing some cute little Frozen purses and card.  They are for my daughter's birthday.  When I asked what paper would you like me to use this year she happily proclaimed Frozen.  Another Frozen birthday - I think Frozen will live forever in our home :)

I used an adorable little purse from Pretty Purses and changed out
the flower with the snowflake from CG Nutcracker Dream.


I added a ribbon to the handle and gemstones to the snowflake.


I also made one of the snowflake cards from JGW Snowflake Stars.  I love this card.  I added a frozen sticker and a stamp sentiment for a beautiful finish to the card.


New to SVG Attic?  Check out these awesome places!


Do what inspires you,
Cyndy G.

Wednesday, January 25, 2017

Winter Fun

I-team Sonja here. There are so many great winter activities, that I decided to display them all for January.
I used several SVG Attic files to create this project listed below under Materials Used
I really wanted an old style sled. I decided to put a couple of SVG Attic files together and create my own sled!


You can't have winter fun without snow! This new snowflake is gorgeous with the glitter paper. 
I like to watch hockey, ice skate not so much (getting too old for falling on ice), same goes for skiing, but building a snowman is still fun!  


A dab of fake glitter snow against the sparkling paper makes it all pop! 
The lights make this set serene when lit up at night! 

This concludes my take on winter and I hope to not see anymore snow for a long time! 
Materials Used:
JGW Snow Flurries~Snowman, large snowflakes (3)
JGW Snow flurries
JGW Winter Wonderland Wreath~Ice skates, skis and ski pole
JGW Winter Wonderland Wreath
January Calendar Graphic Quilt Panel (Silhouette Design Store) A SnapDragon Snippet file~Sled and January sentiment
Trellis Arbor 2 Designs (Silhouette Design Store) A SnapDragon Snippet file~Sled

Snowflake 3D Stick Ornament (Silhouette Design Store) A SnapDragon Snippet file~Snowflake


Recollections paper: blue, light blue, silver, and shimmer gray
Rinea Foil: blue, light blue, and silver (snowflakes, ski, skate, hockey stick)
Silhouette Cameo 3
Silhouette Studio Designer Edition
Scotch ATG gun
Aleene's Original Tacky Glue
Recollections Brads
DecoArt Glistening snow-tex

Monday, January 23, 2017

Chinese Lunar New Year Firecracker with Angeline

Happy Monday.
Angeline here to share with you a firecracker I made for the Chinese Lunar New Year (this weekend) using the JGW Patriotic Celebration kit.

Usually for the New Year, we have firecrackers (and oranges too amongst many things!) and this was just perfect as a decor in our home.

SVG Attic: Chinese Lunar New Year Firecracker with Angeline #svgattic #scrappyscrappy #firecracker #jgwpatrioticcelebration #lunarnewyear #chinesenewyear #celebration #homedecor

I found some Valentine paper that actually had some oriental pattern to it and used it for my firecracker, along with some stickers with gold foil. The 福 word is a common Chinese character during the Lunar New Year, which means blessing, fortune, good luck and happiness.

Here's an upclose of the large firecracker!

SVG Attic: Chinese Lunar New Year Firecracker with Angeline #svgattic #scrappyscrappy #firecracker #jgwpatrioticcelebration #lunarnewyear #chinesenewyear #celebration #homedecor

SVG Attic: Chinese Lunar New Year Firecracker with Angeline #svgattic #scrappyscrappy #firecracker #jgwpatrioticcelebration #lunarnewyear #chinesenewyear #celebration #homedecor


***

Thanks for stopping by and to those who are celebrating the Chinese Lunar New Year, wishing you a Gong Xi Fa Cai!
Angeline Choo
blog // facebook // instagram // youtube

Saturday, January 21, 2017

SVG Attic LOVE Cards with Beth

Valentine's Day is coming fast!  Have you started on your Valentine's cards and treats?  Beth from Beth's Beauties here with these two very different LOVE cards.
This card is made from the Be Mine set at SVG Attic.  I used DCWV Jet Black and Holiday Glitzy Glitter stacks.
Cherry Midnight Trendy Twine, Nuvo crystal drops in white, and a key were perfect embellishments.
The second card is more of a sweet love card.  It is from the SDS Blooming Love kit.  I used DCWV's Happy Day stack for all the layers.
Totally White Trendy Twine, glossy accents and Nuvo crystal drops in white were used to embellish this card.  I popped up the word with foam tape for extra dimension.

Here is a look at the sets I used today:


I hope you have a wonderfully crafty day!

New to SVG Attic? Check out these awesome places!

Friday, January 20, 2017

Blooming Love


Hi and welcome, everyone! Lisa from The Relativity of Paper sharing a fun Valentine's Day Project. I decided to get a head start on my Valentine's Day projects by using the SDS Blooming Love Collection and creating the Blooming Love Flower Pot and Heart Flower. Instead of adding the leaves I went with a bow. 


I created the bow using Valentine's Day paper from my stash, the heart and pot are pink and gray cardstock.  

As always, thanks for joining us! 

Wednesday, January 18, 2017

Little Boy Onsies

Have you tried Fabric Transfers with your SVG Files yet?
Tracy here from the Idea Closet.

It is so easy to create a custom T-shirt!
In fact I made 3 Onsies for my little grandson in almost no time at all.


Let me show you how easy it is...

First pick a card from SVG Attic. 
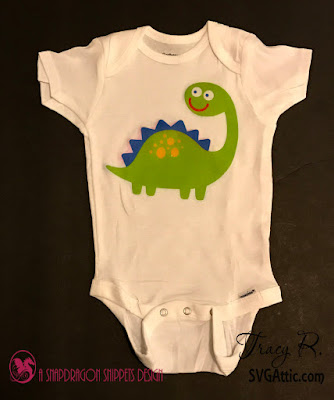
For the Dinosaur tshirt I used the birthday card from JGW Dino Party Kit

JGW Dino Party Kit

I am using Silhouette Design Studio but you can also use Cricut Design Space as well


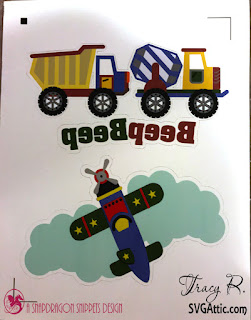
1. Open up the Dino Birthday card
2. Ungroup and delete the words and all the card pieces


3. Fill all the pieces you are going to use with color


4. Layer the pieces (you may have to arrange some of them so they are front to back)
5. Select all the pieces and group together.
6. resize if needed.
7. Turn off the line color
8. Create an offset of .125"
9. Mirror the image- I forgot to do it on the dinosaur and it was ok but if you have any words make sure you do it!


(I missed takeing pictures of the next couple of steps with the dinosaur but I will show you with this one

10. Turn on your Registration marks
11. Print to the front side of  Fabric Transfer *Do not use the Tshirt Transfer Setting on your printer if you have it- it will flip the image and your registration marks will not line up.
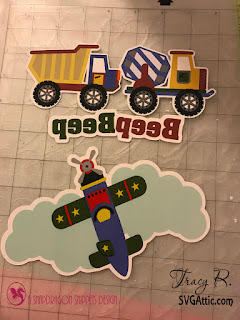
12. Cut by using Advance > Cut by line Color and selecting only the red (outline)


13. Weed out the negative spaces


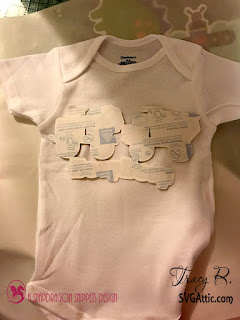
14. Prep the shirt by pressing it for a few seconds to warm up.
15. Place the Transfer Material face down on the tshirt
16. Follow directions on the back of the package, use an iron or a heat press to apply the transfer
17. When it has cooled down remove the paper backing.


Now you have a fun shirt to share with someone special (or make one for yourself)

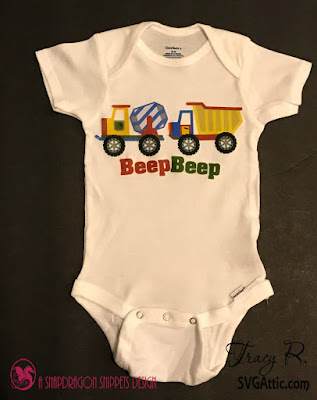
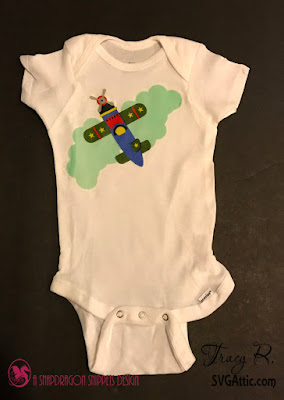
Here is an up close look of the two Onsies I did.


use the cards from the JGW Work Zone

JGW Work Zone

and the SDS Ready For Take Off
SDS Ready For Take Of

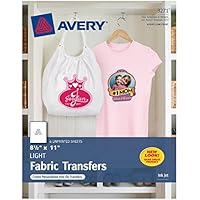
and Fabric Transfers
Product Details

I hope you will give this a try, but fair warning...Its addicting!